I decided to do something a bit different again, just to change things up. Some readers may remember my attempt at making my own suet cakes (Keeping Busy During the Quarantine: Make Your Own Suet, May 6, 2020). This time I thought I would attempt to make smaller morsels and I found my inspiration on the National Audobon Society’s Instagram. On December 21st 2020 they posted a video with an easy birdseed ornament recipe, so I decided to test it out.
1 Tablespoon of unflavored Gelatin

I still had a heap of gelatin from my suet cake experiment. It was actually a relief to use some of it, as I won’t be cooking it for human consumption, my husband being a vegetarian. A tablespoon ended up being two packets (7 grams each).
2 Tablespoons of cold water- sit one minute
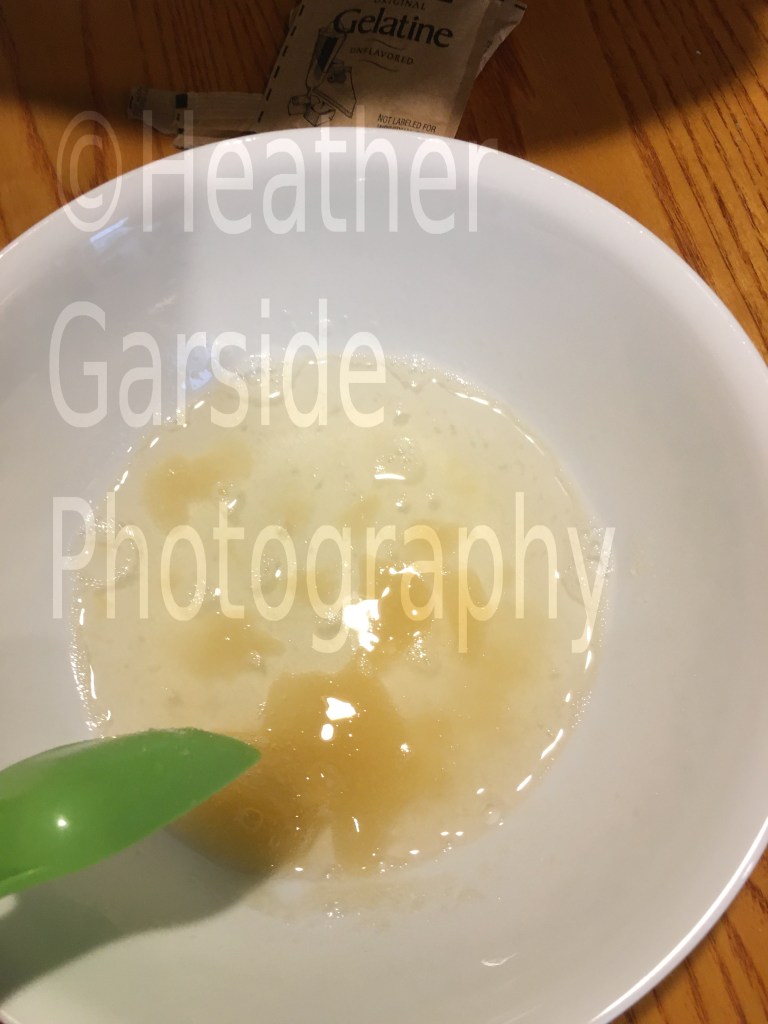
I am not sure if you are supposed to stir the gelatin in the cold water, but I did. It resulted in some lumps and clumps.
1/3 cup of boiling water- stir until dissolved
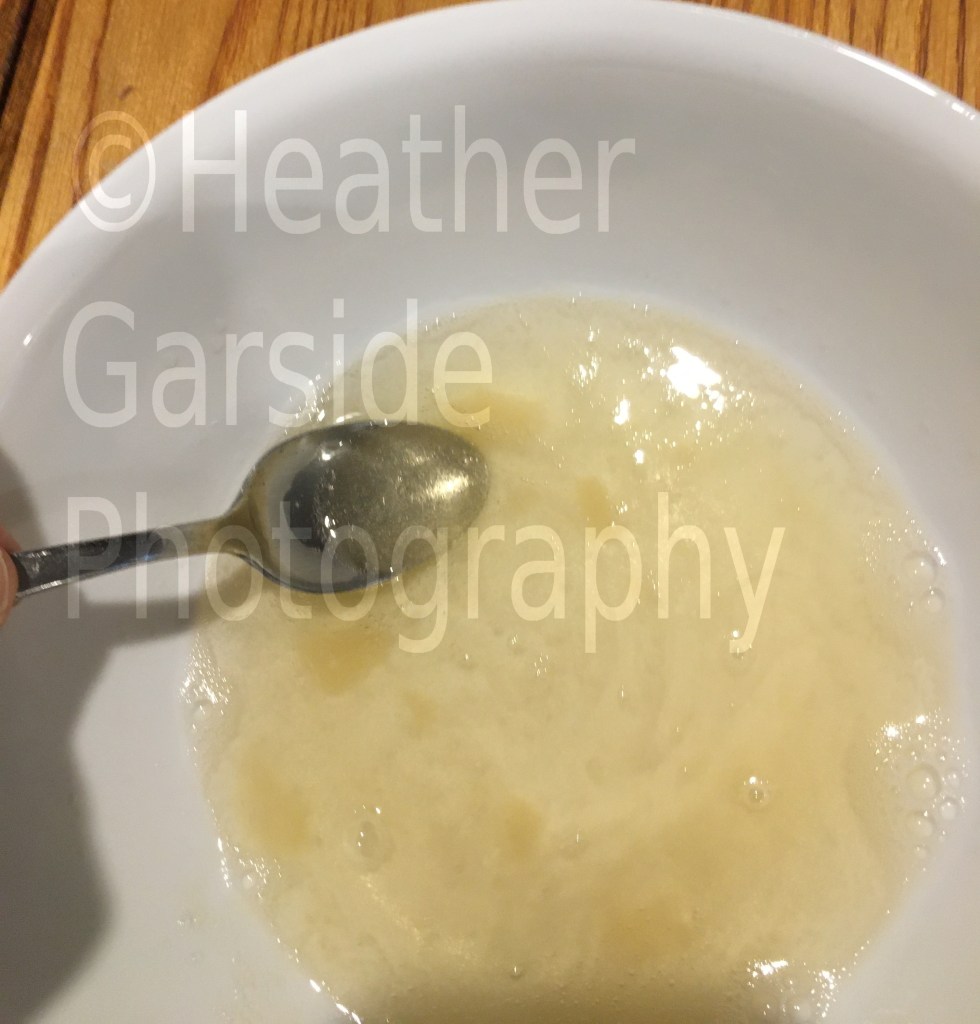
While I stirred I made sure to knead the lumps. This broke them up and make for a consistent texture throughout the mixture.
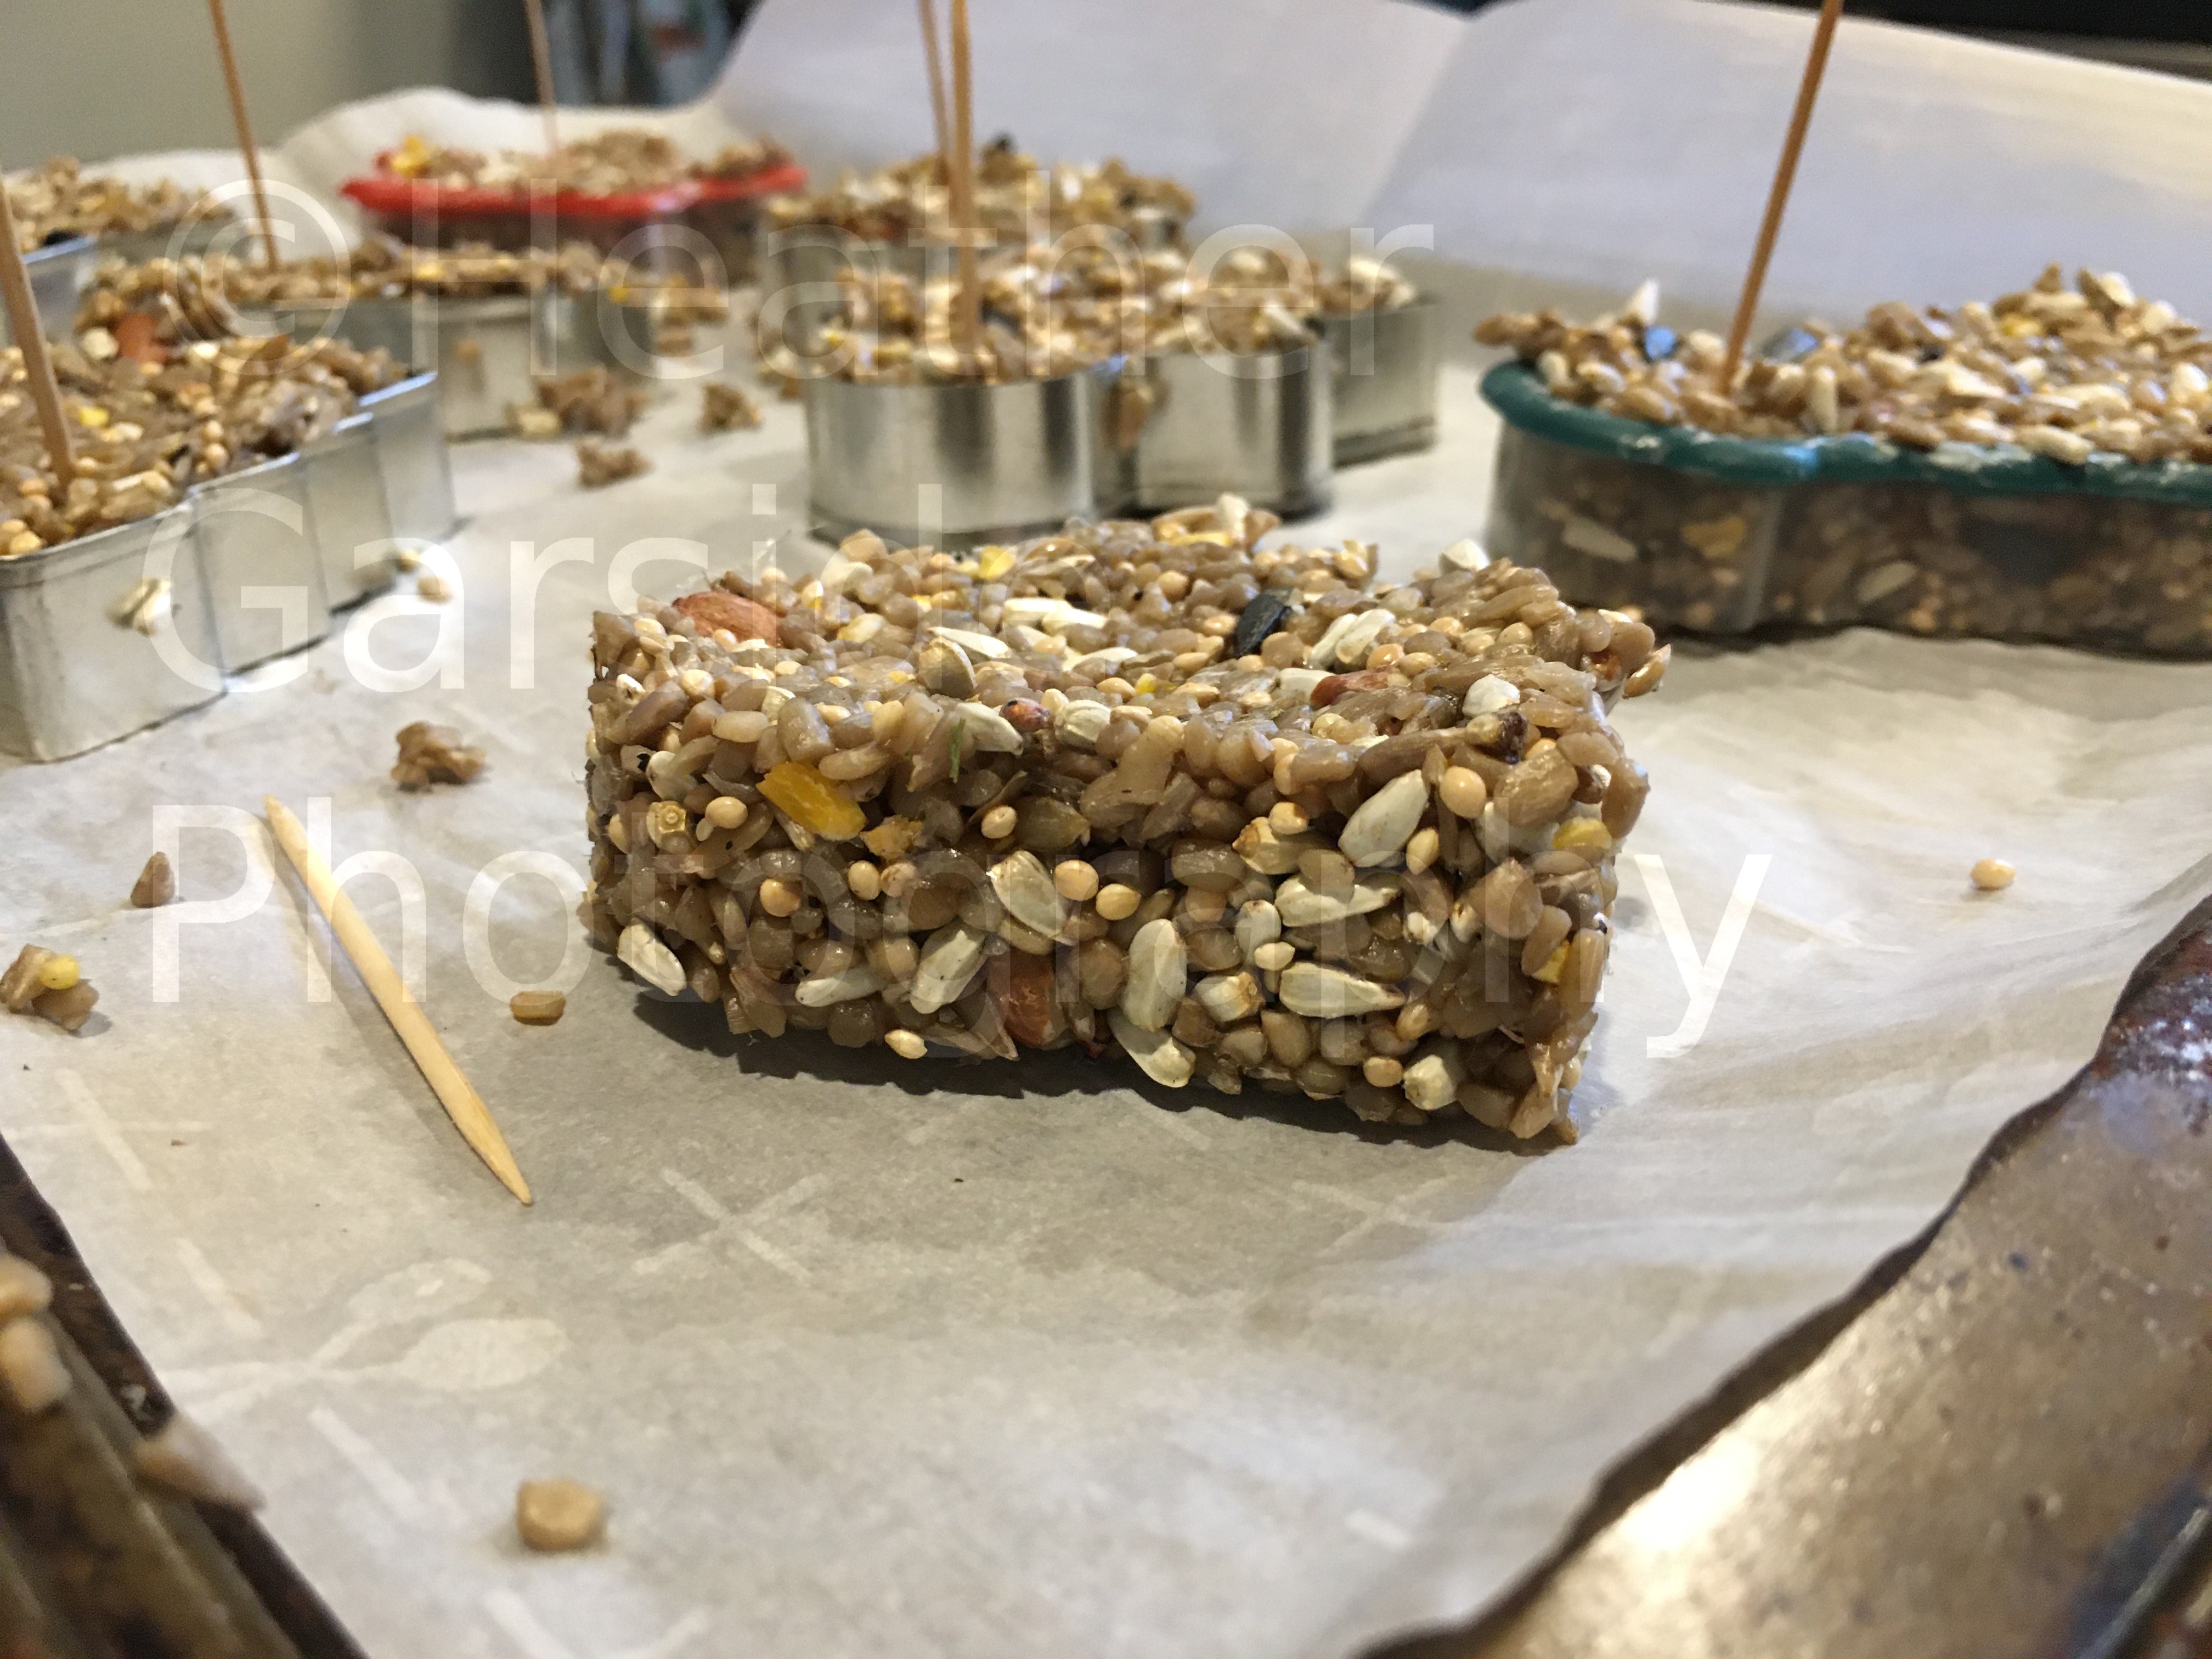
2 cups birdseed-mix thoroughly
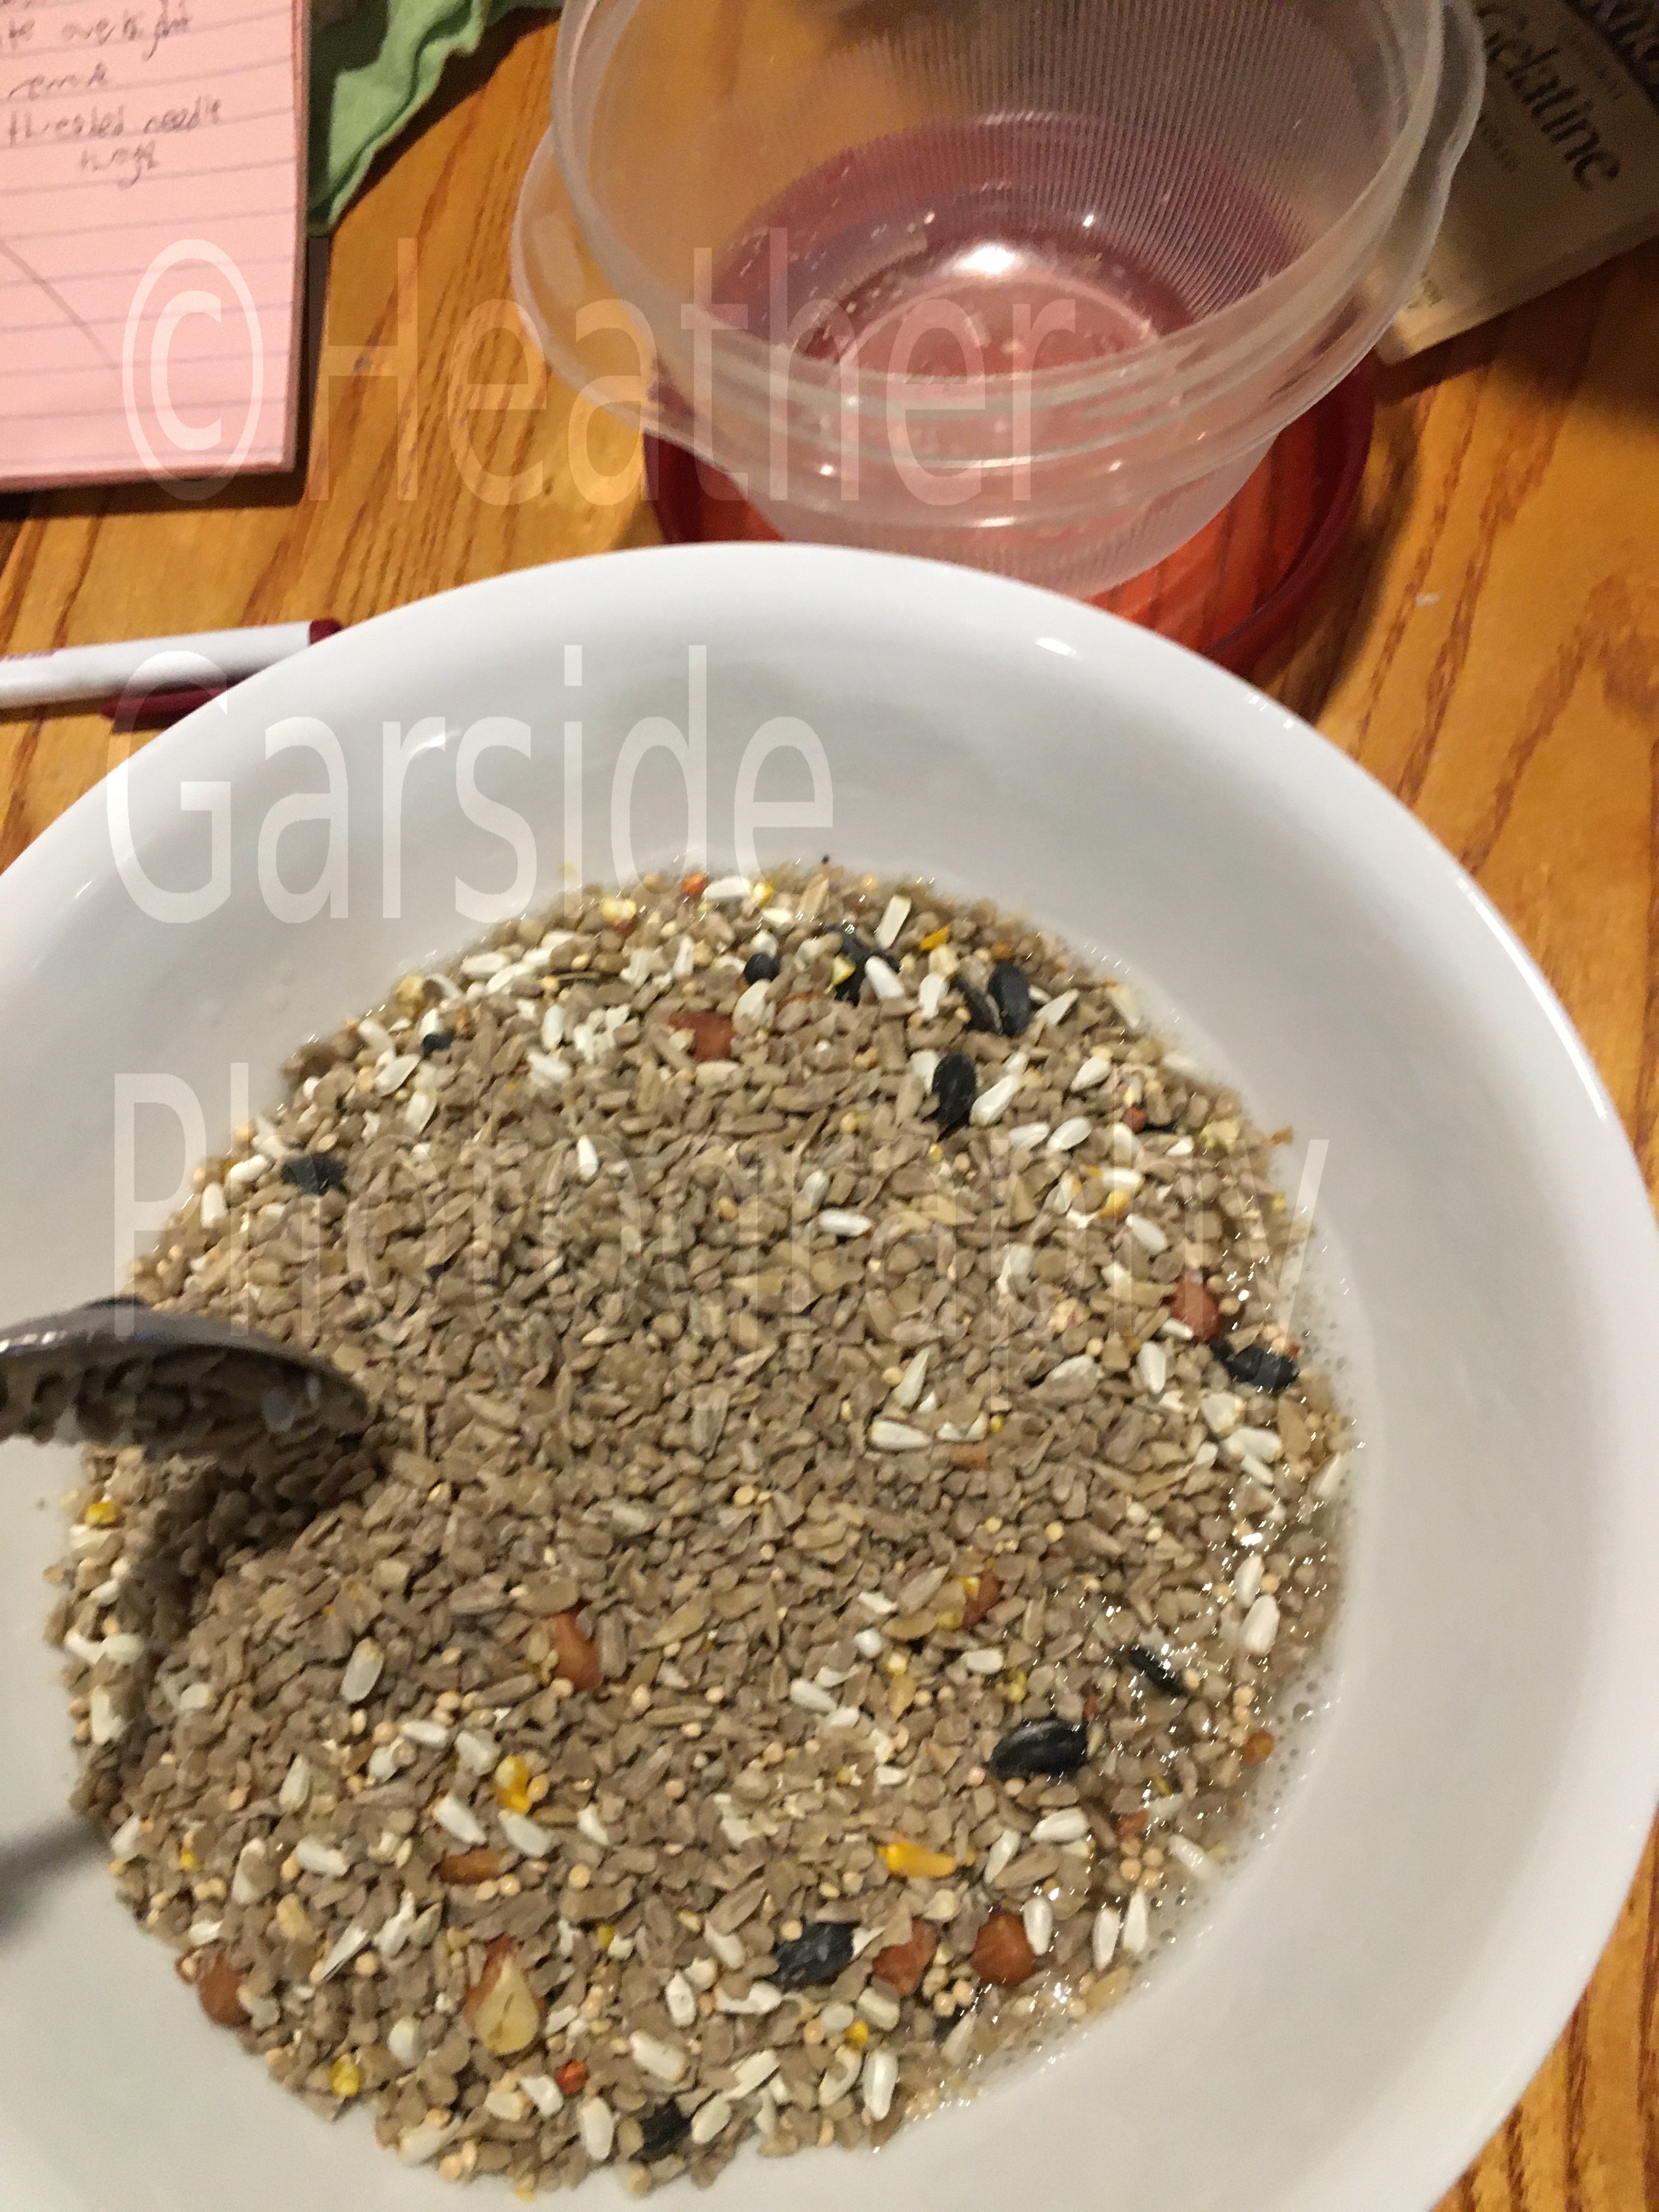
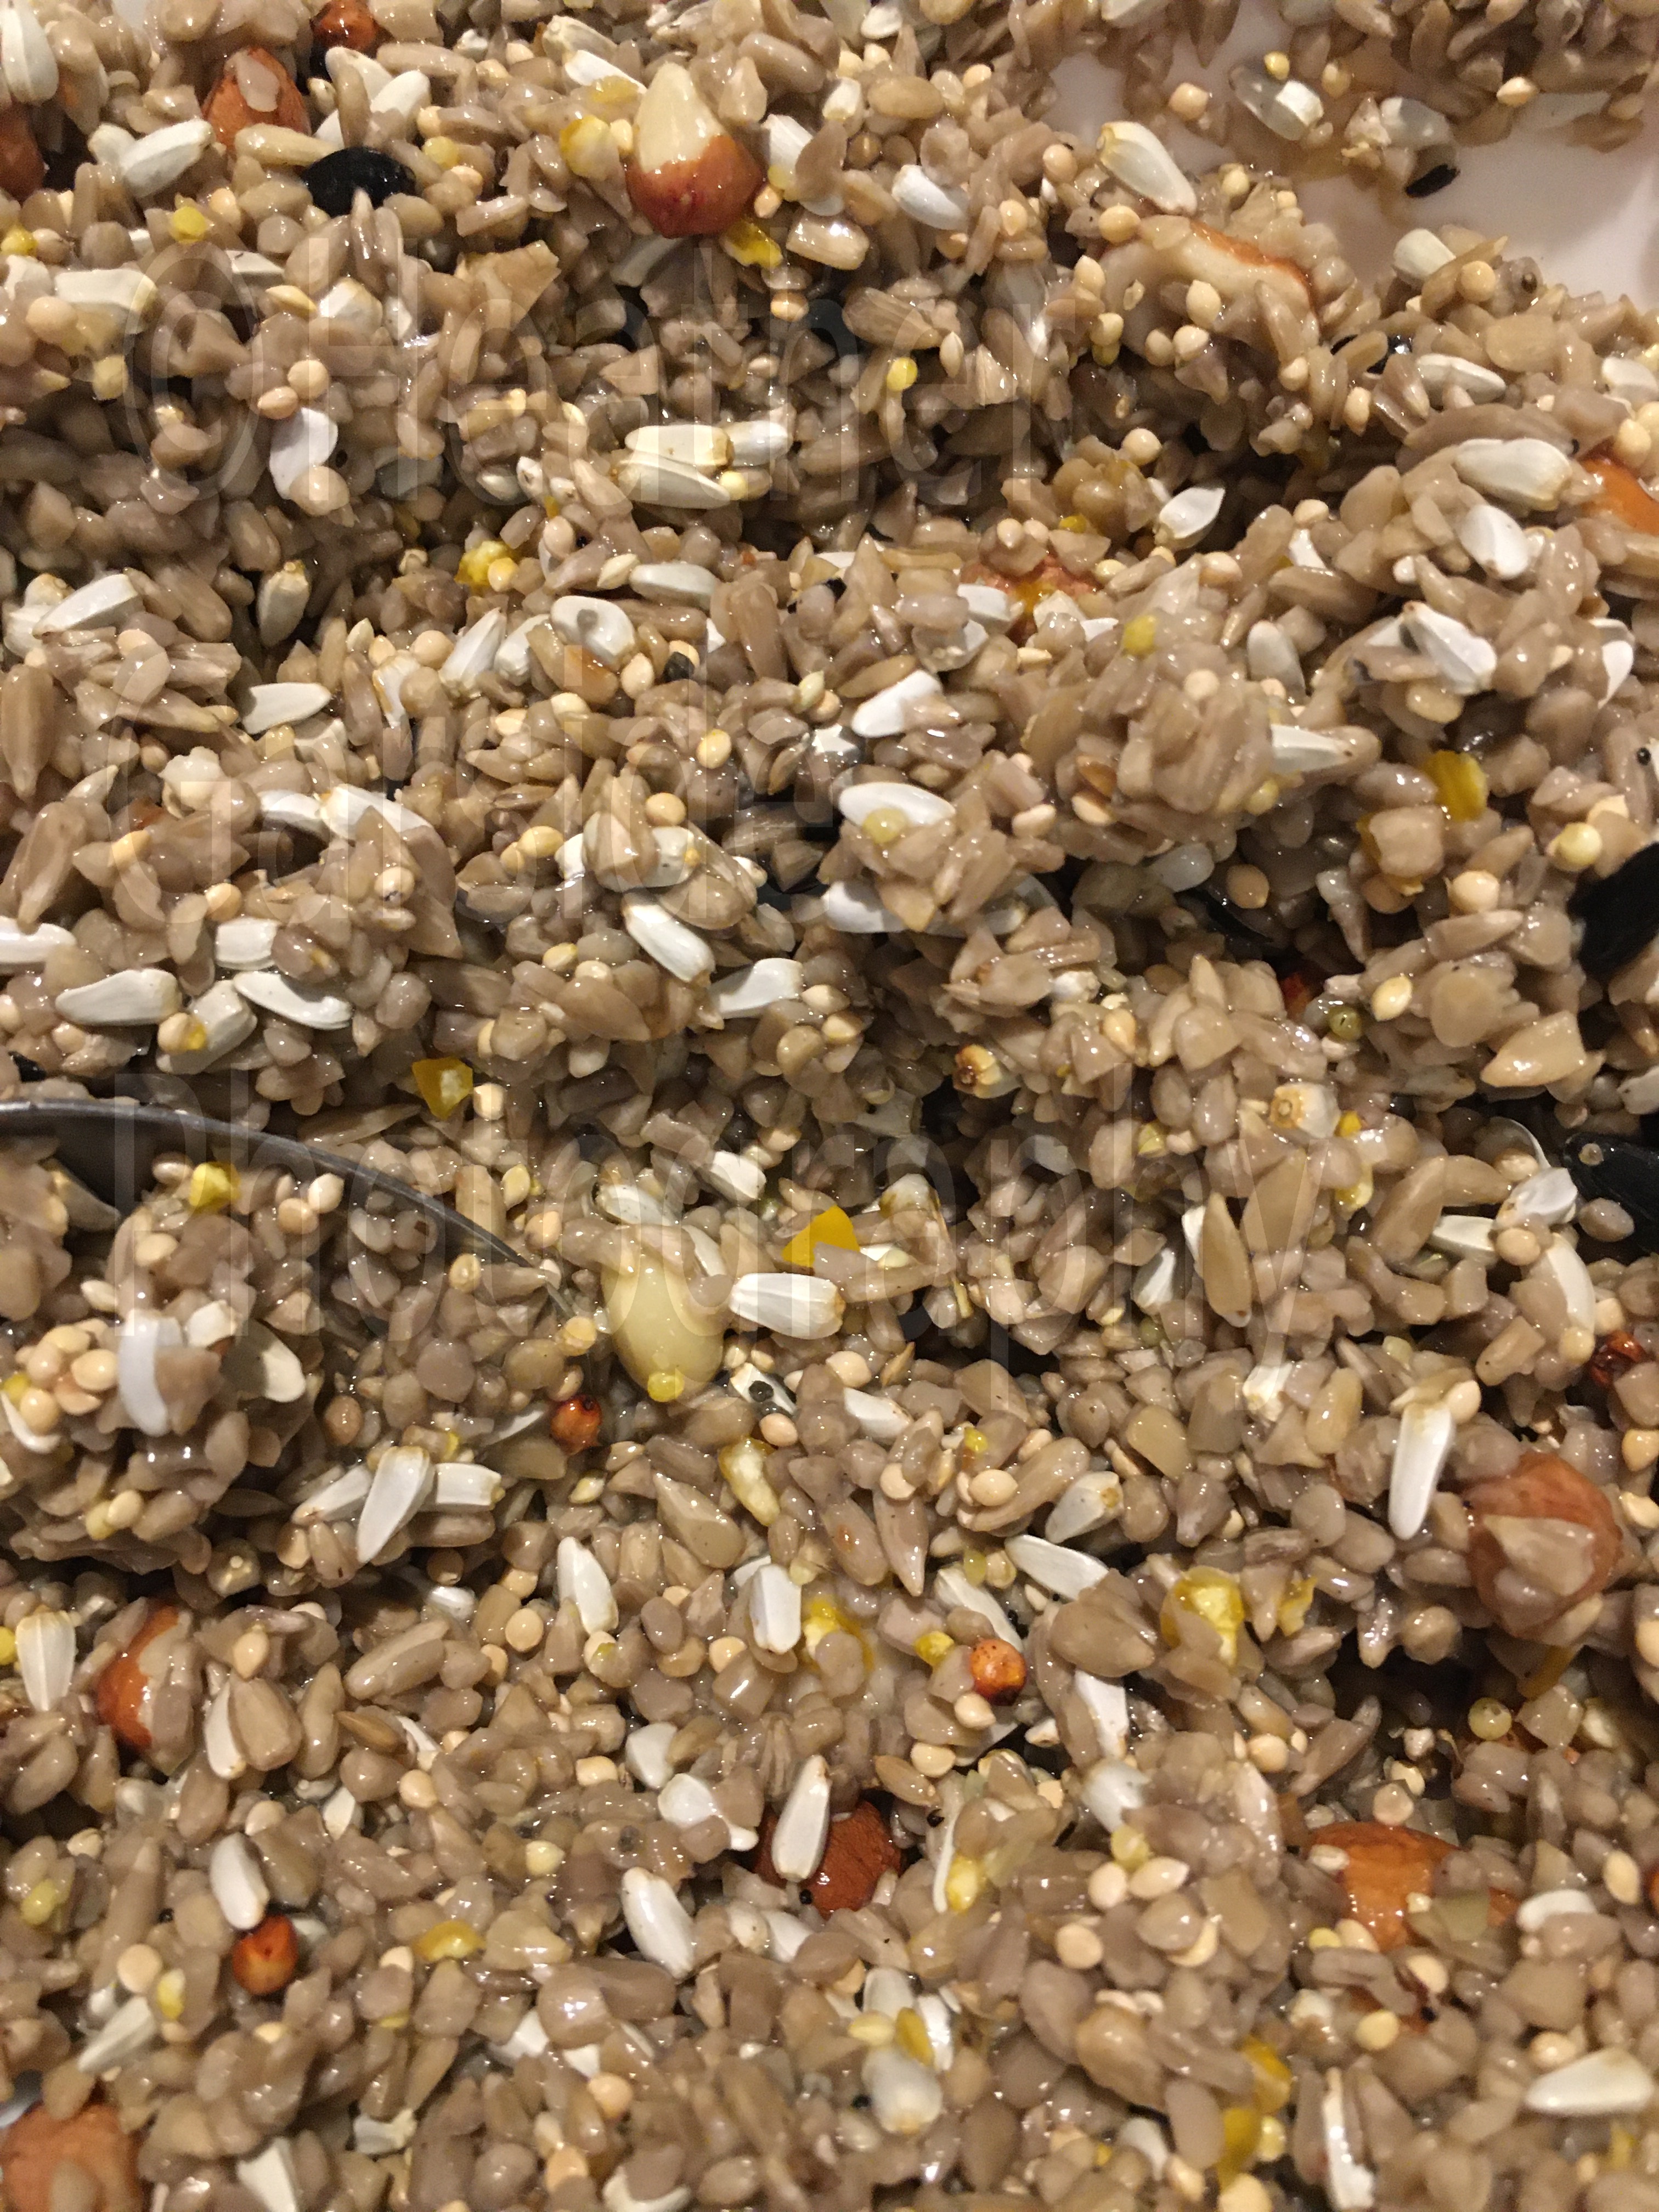
In the video they show cherry seed. I just used the mix I have, which is one of my own concoction. As I stirred the mix, you were able to see the gelatin sparkling and shining on the seeds, making it fairly easy to determine when it was “thoroughly” mixed.
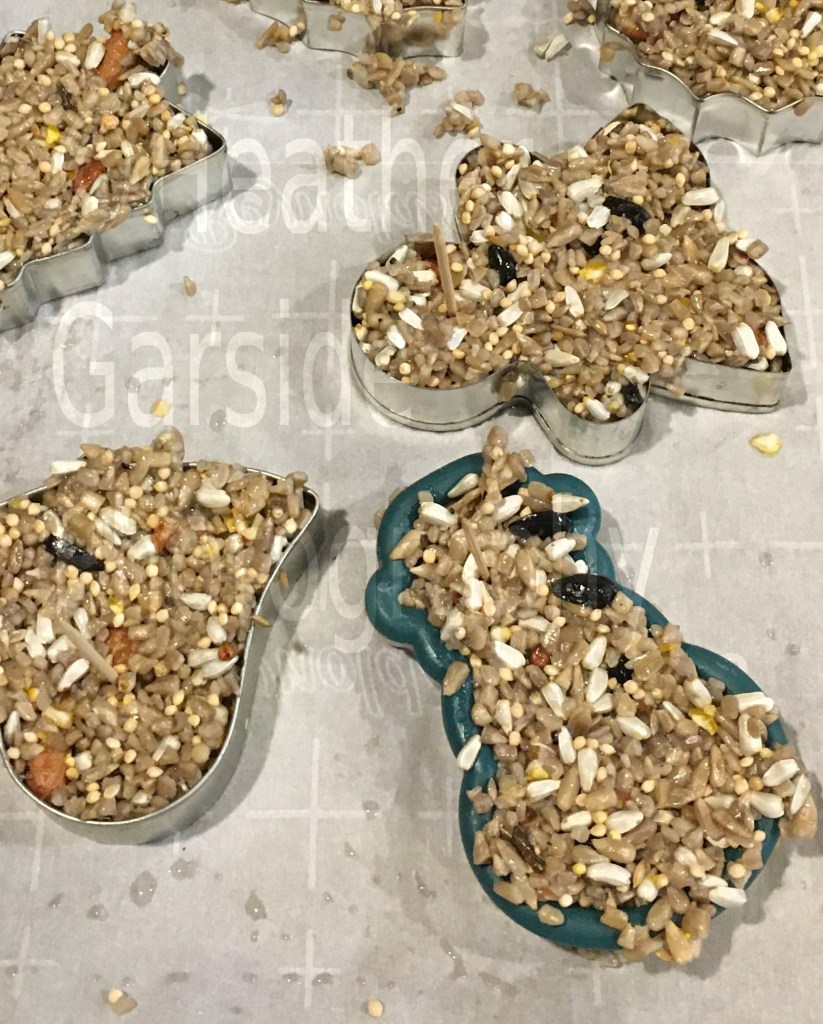
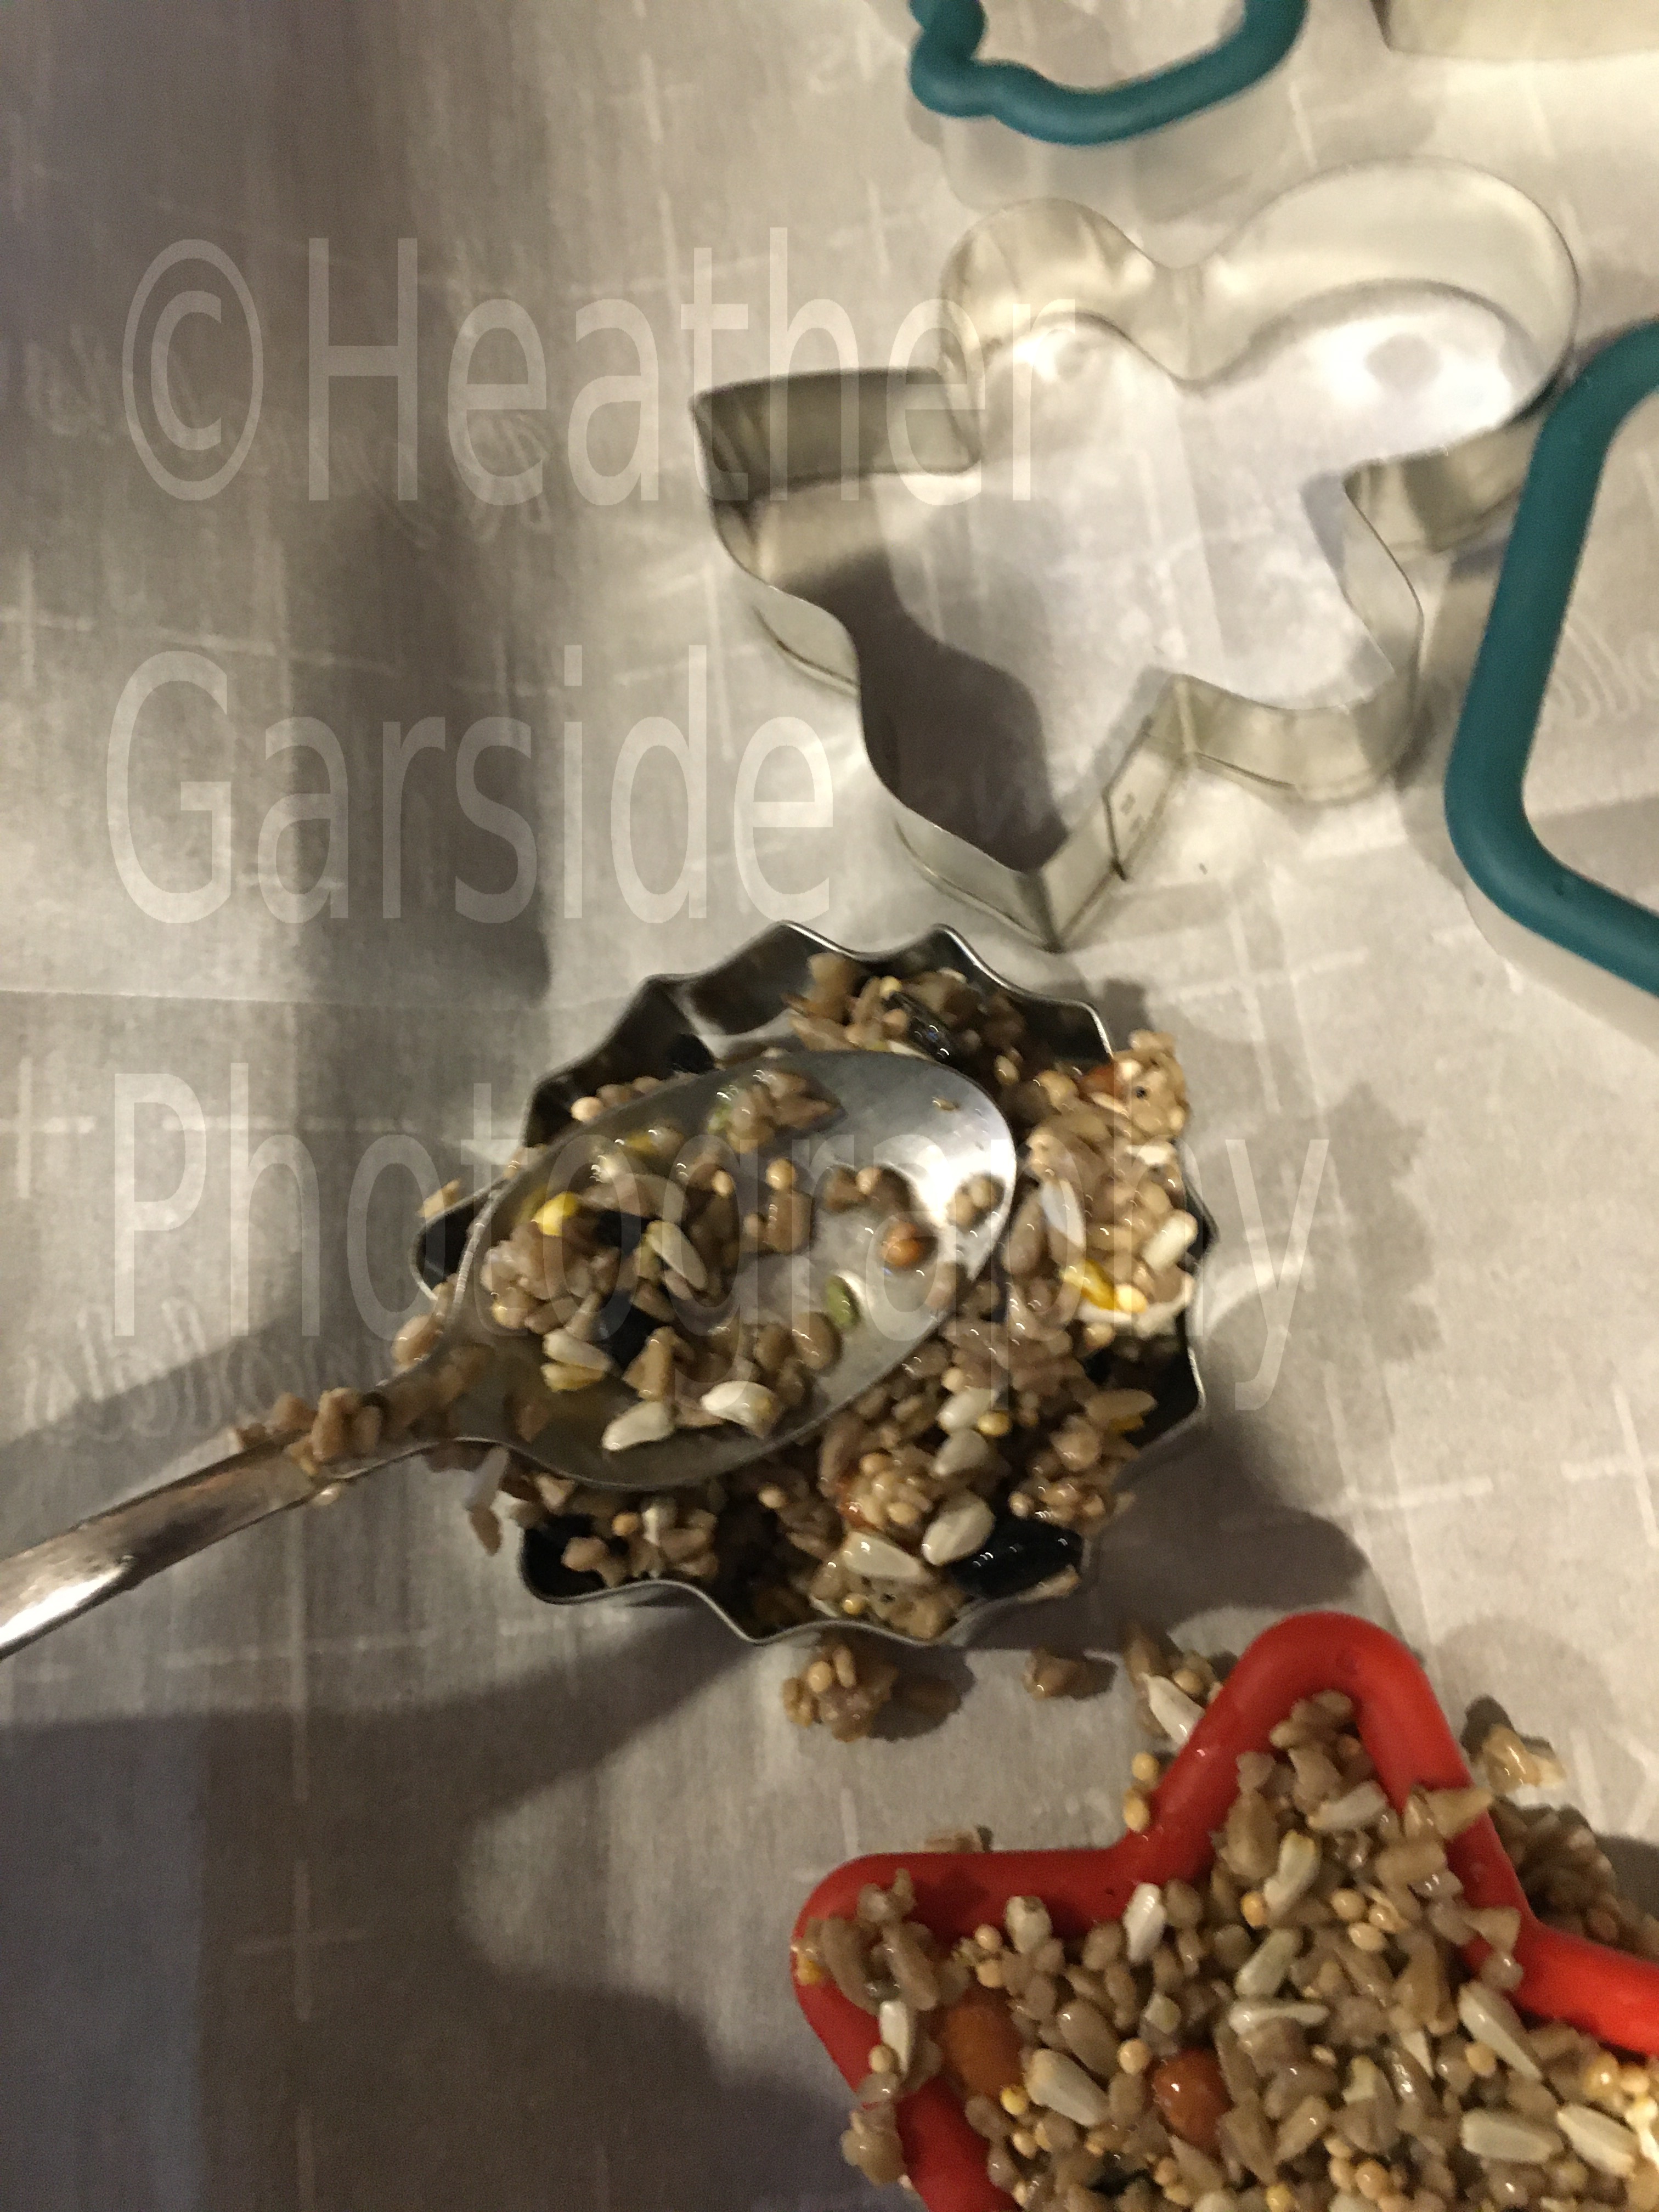
Fill cookie cutters-press down firmly
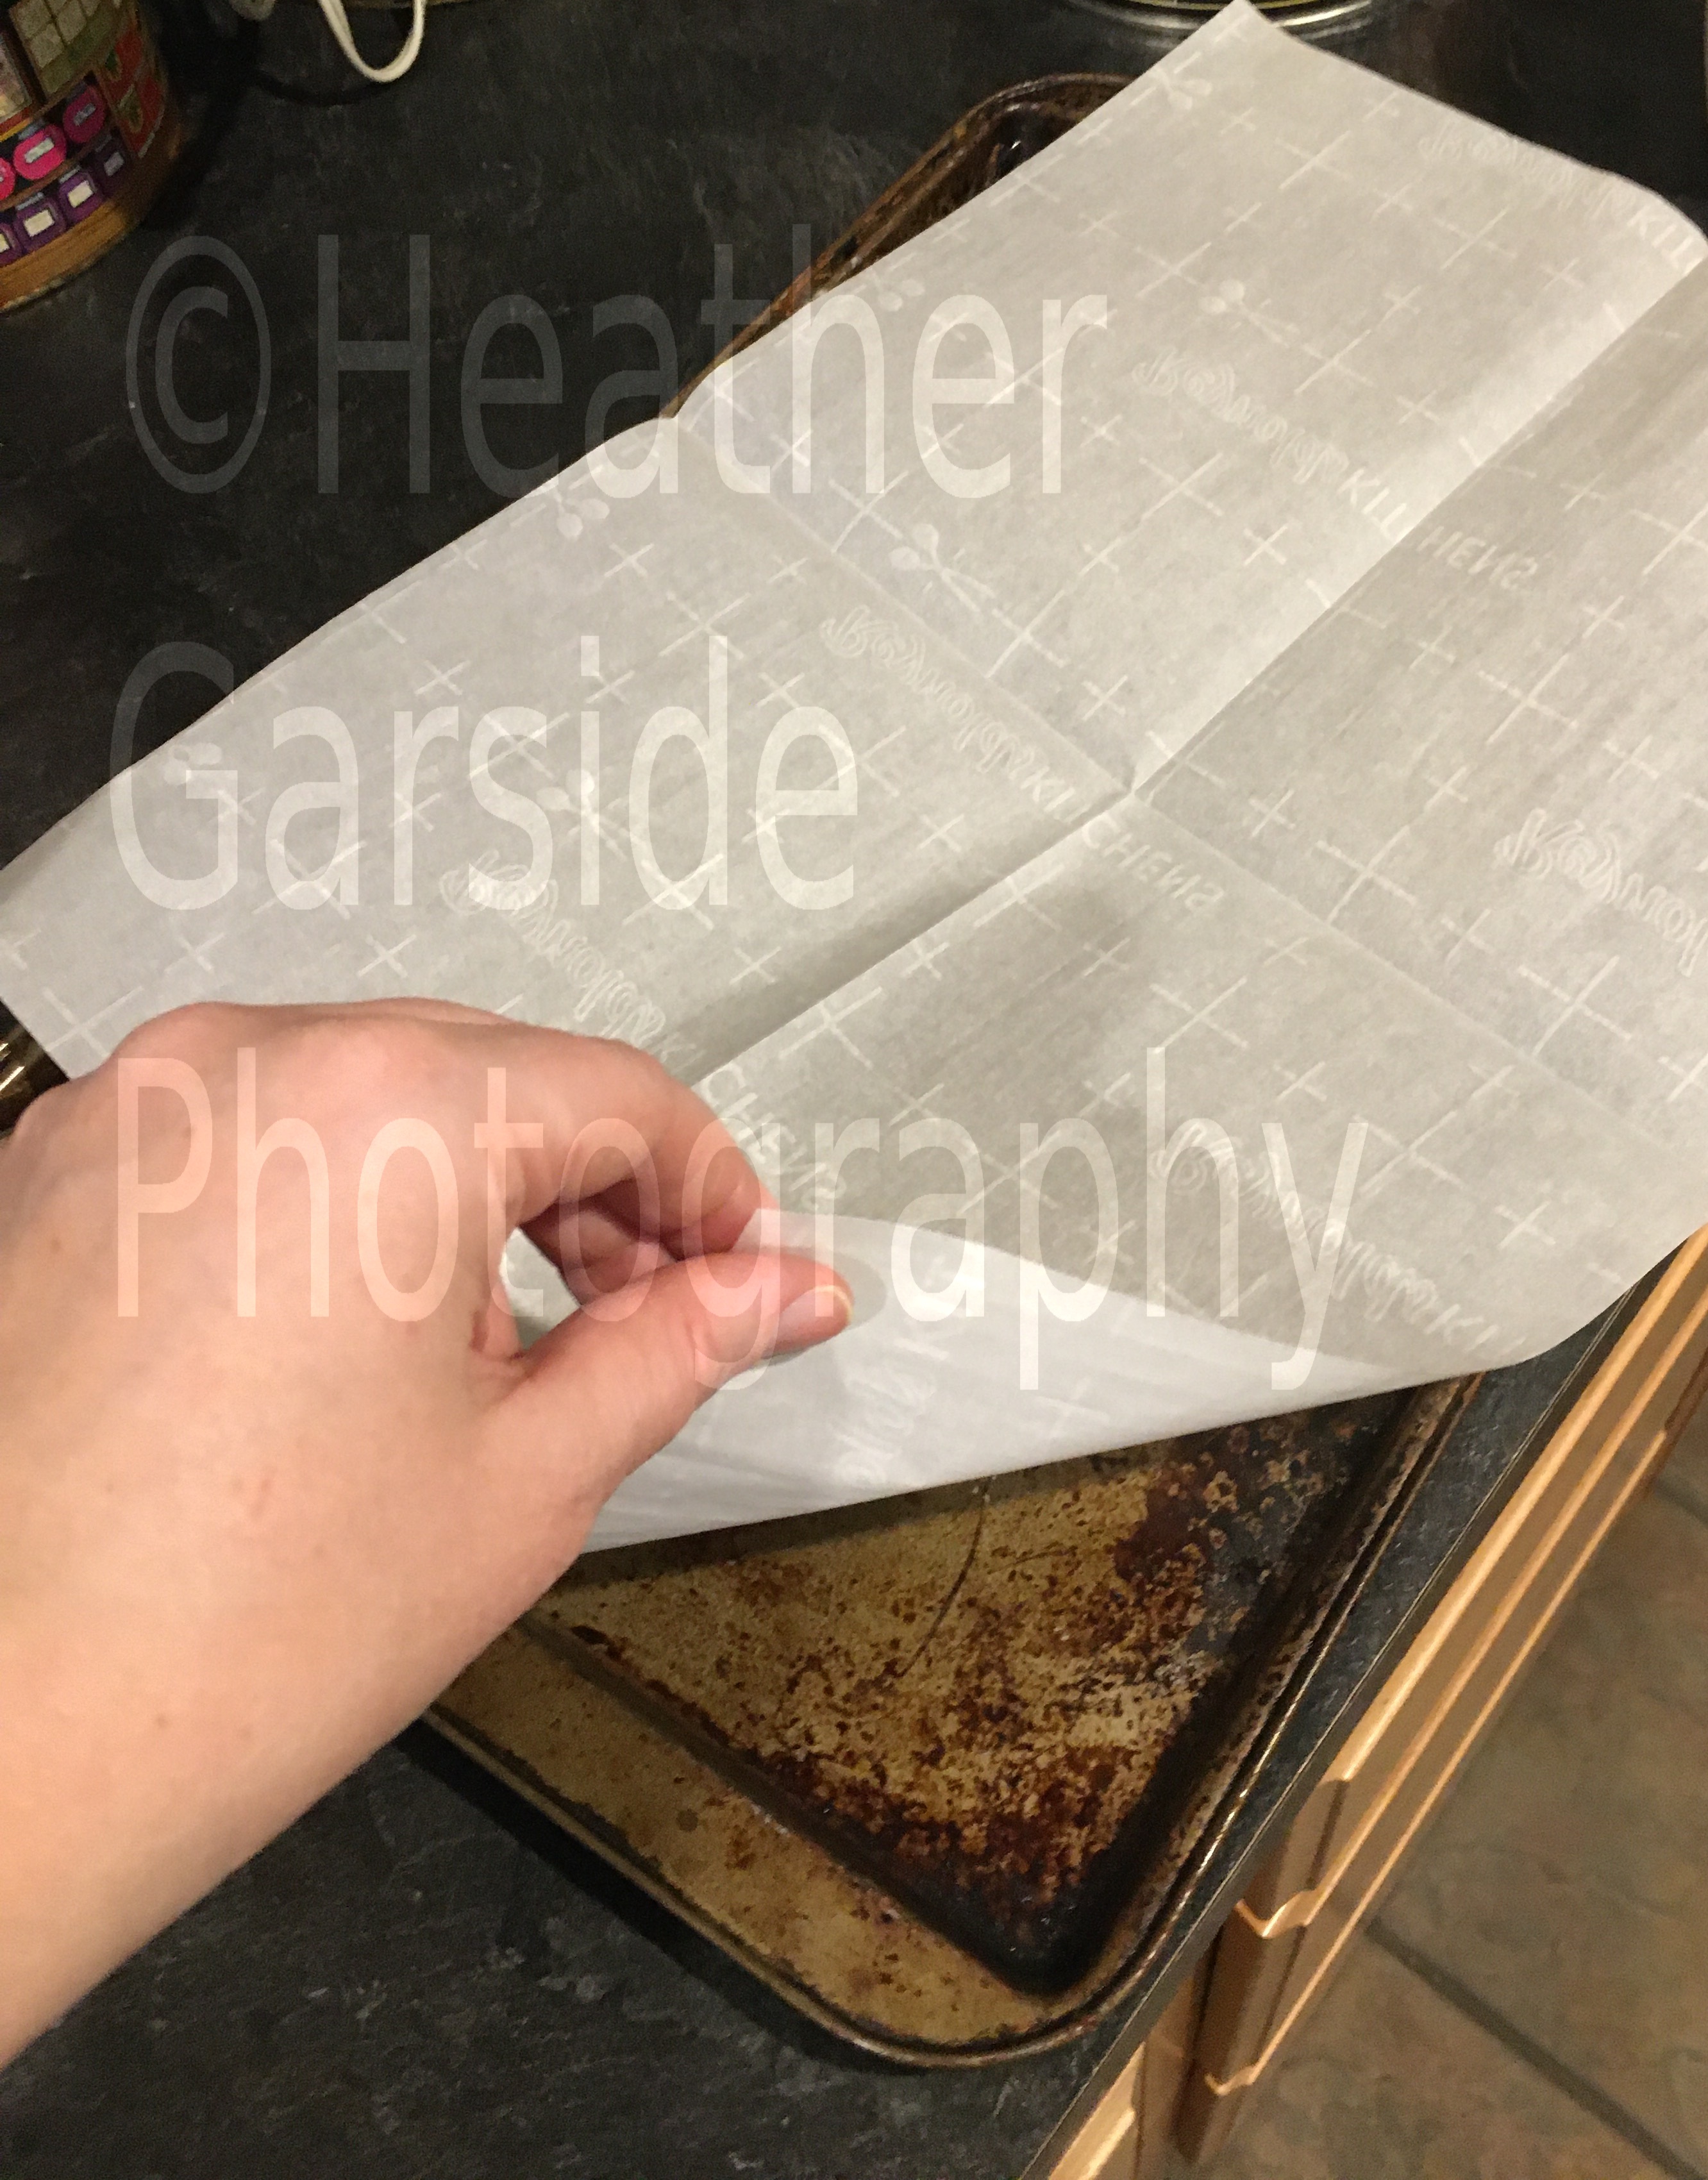
The video shows the cookie cutters on a cutting board. I decided a baking tray would be easiest, and I used a piece of baking parchment to be sure that the surface of the tray didn’t get gross from gelatin.
The mix filled eight average sized cookie cutters, all between 2 ½ and 3 ½ inches long.
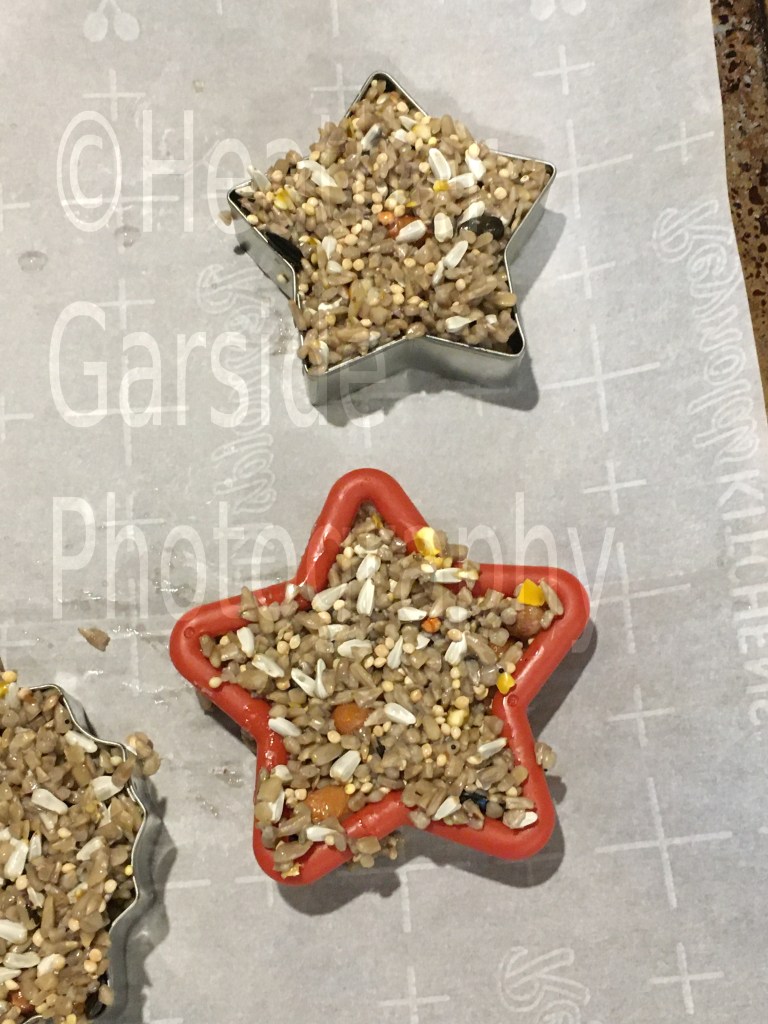
The video shows all metal cookie cutters being used, but I decided to experiment with a mix of metal and plastic cutters. I actually had the same set of metal cutters as in the video, and a very similar set of flimsy plastic cutters from the Dollar Store. For the sake of science, I made sure I did two the same shape (the star) so that it will be easier to judge if the material of the cutter alone makes it easier or harder to extract, rather than considering if the shape was a factor.
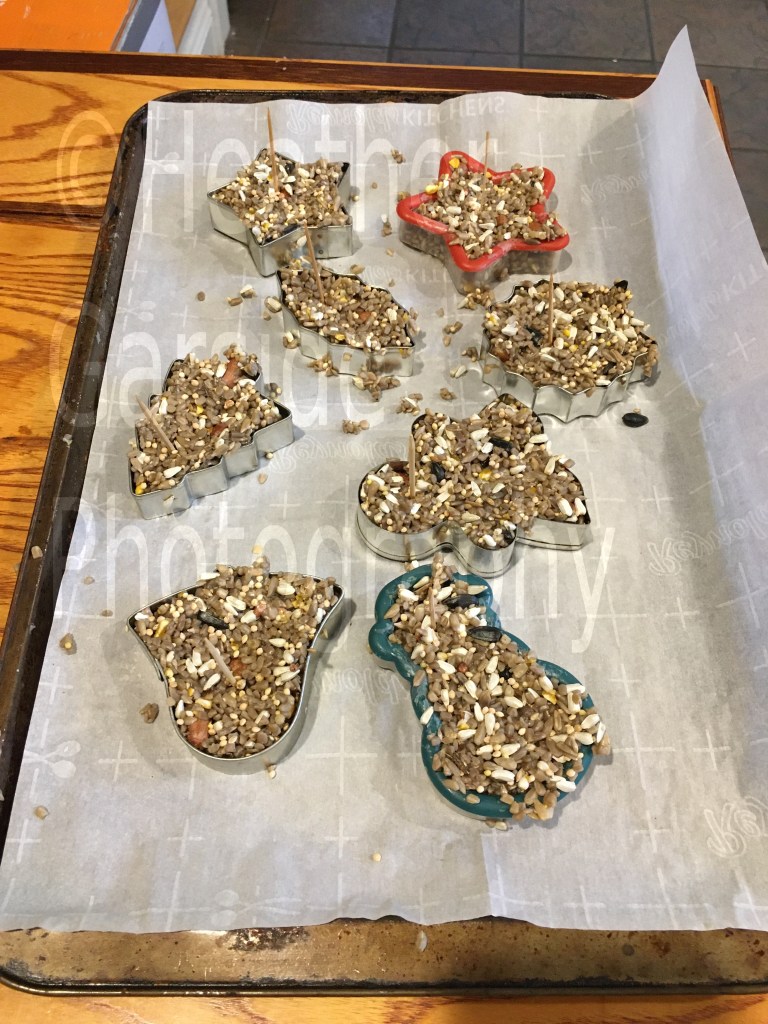
Refrigerate overnight
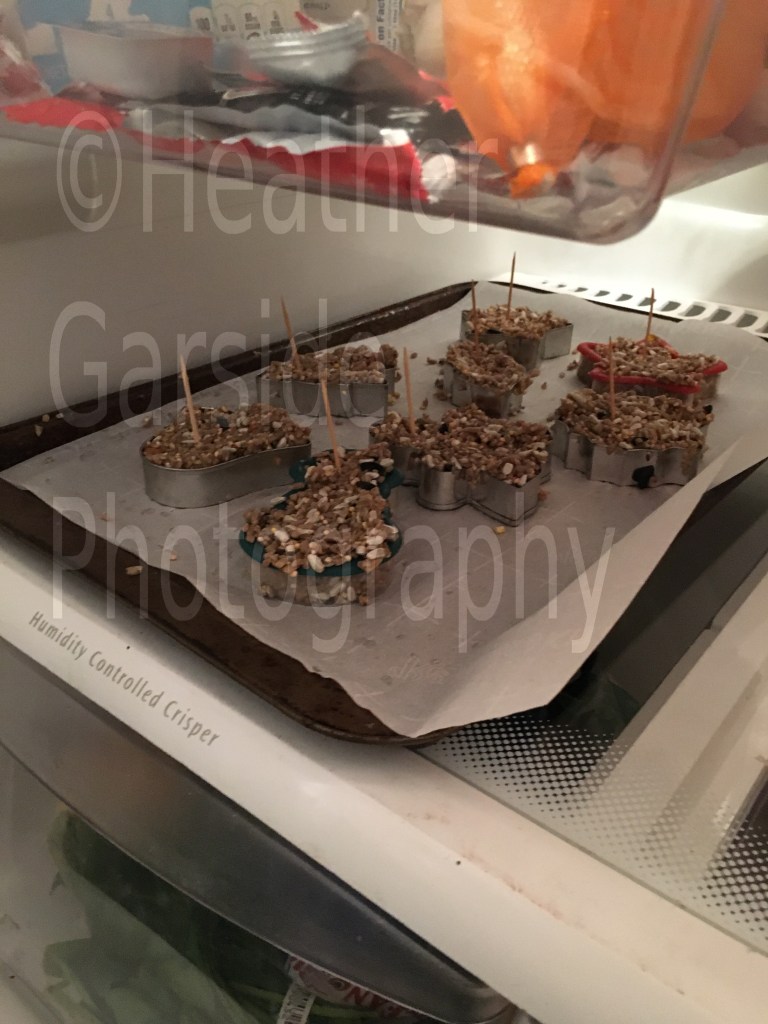
I placed them in my refrigerator. And there they sat, not for one night, but two because, well, life happens.
Gently remove from molds
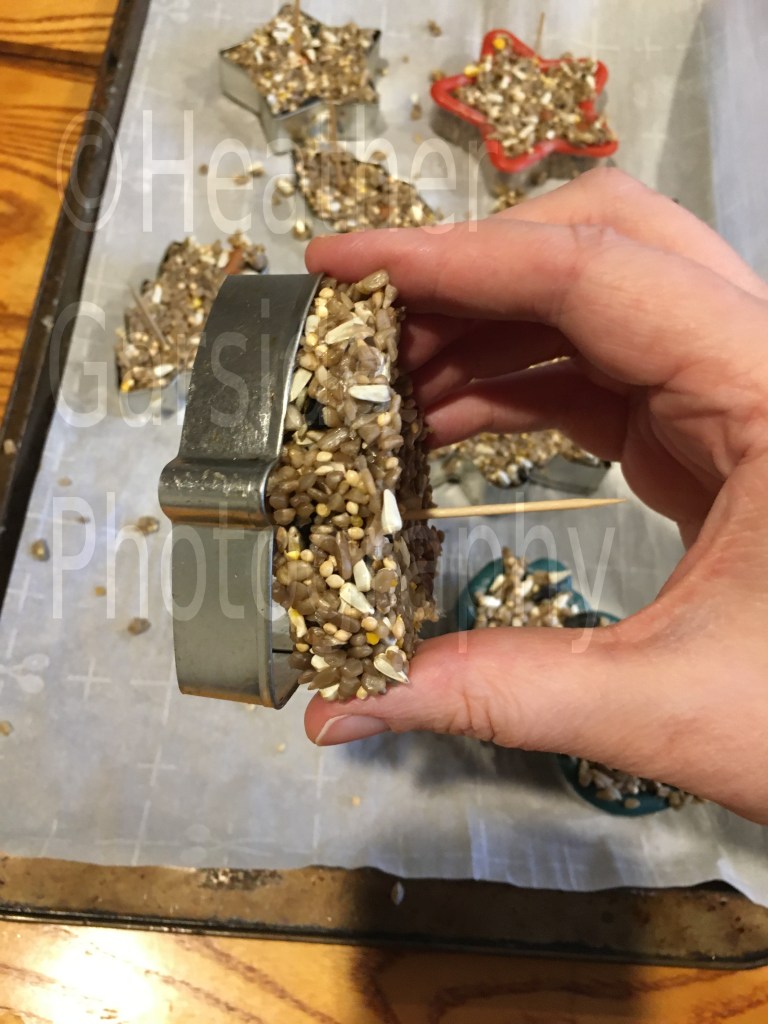
After a bit of gentle coaxing I determined that the best way to get the ornaments out of the cookie cutters was by pushing the ornaments from behind, while pulling the mold backward. This worked really well with the metal cutters. The plastic cutters were a bit more stubborn, and I did need to apply a bit more force to separate them from their molds.
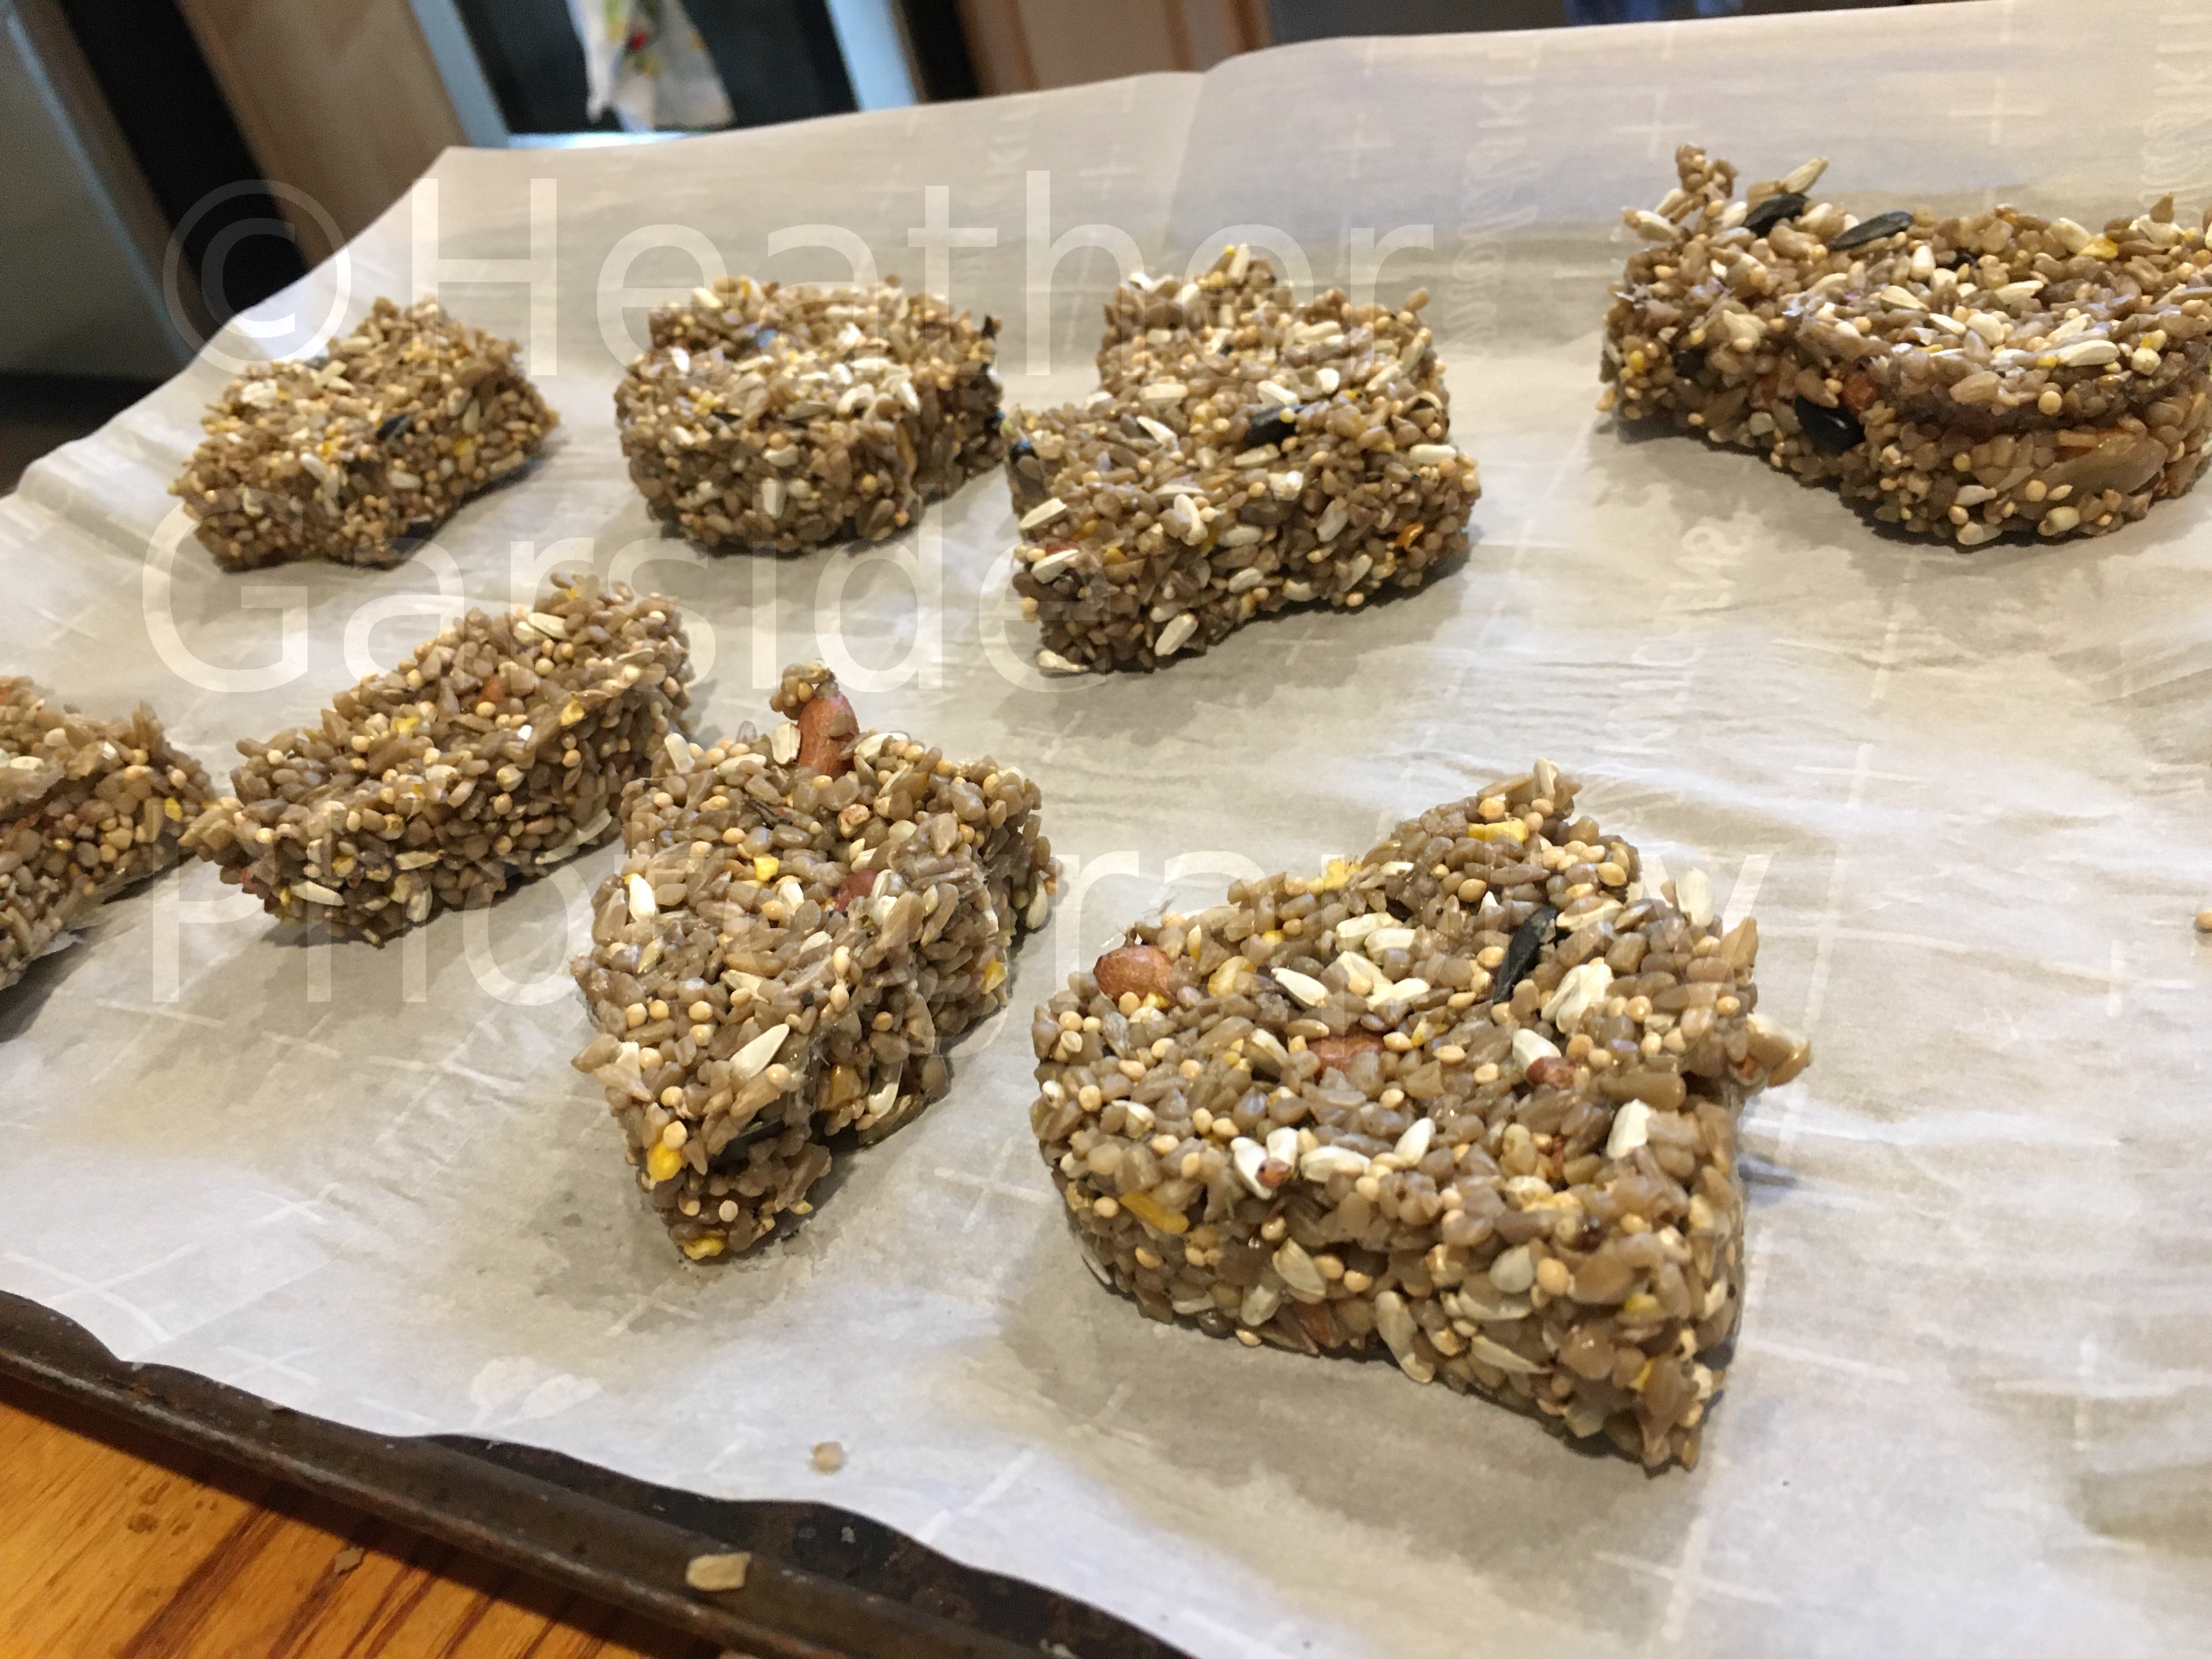
I managed to get both of the ornaments from the plastic cutters without a fatality, but I can see how the plastic cutters might result in more breakages than if one uses exclusively metal cutters. But after a few minutes of patiently applying pressure, I had eight ornaments, all ready to put strung up, each about one inch thick.
Pull a threaded needle through a thick area and tie a knot
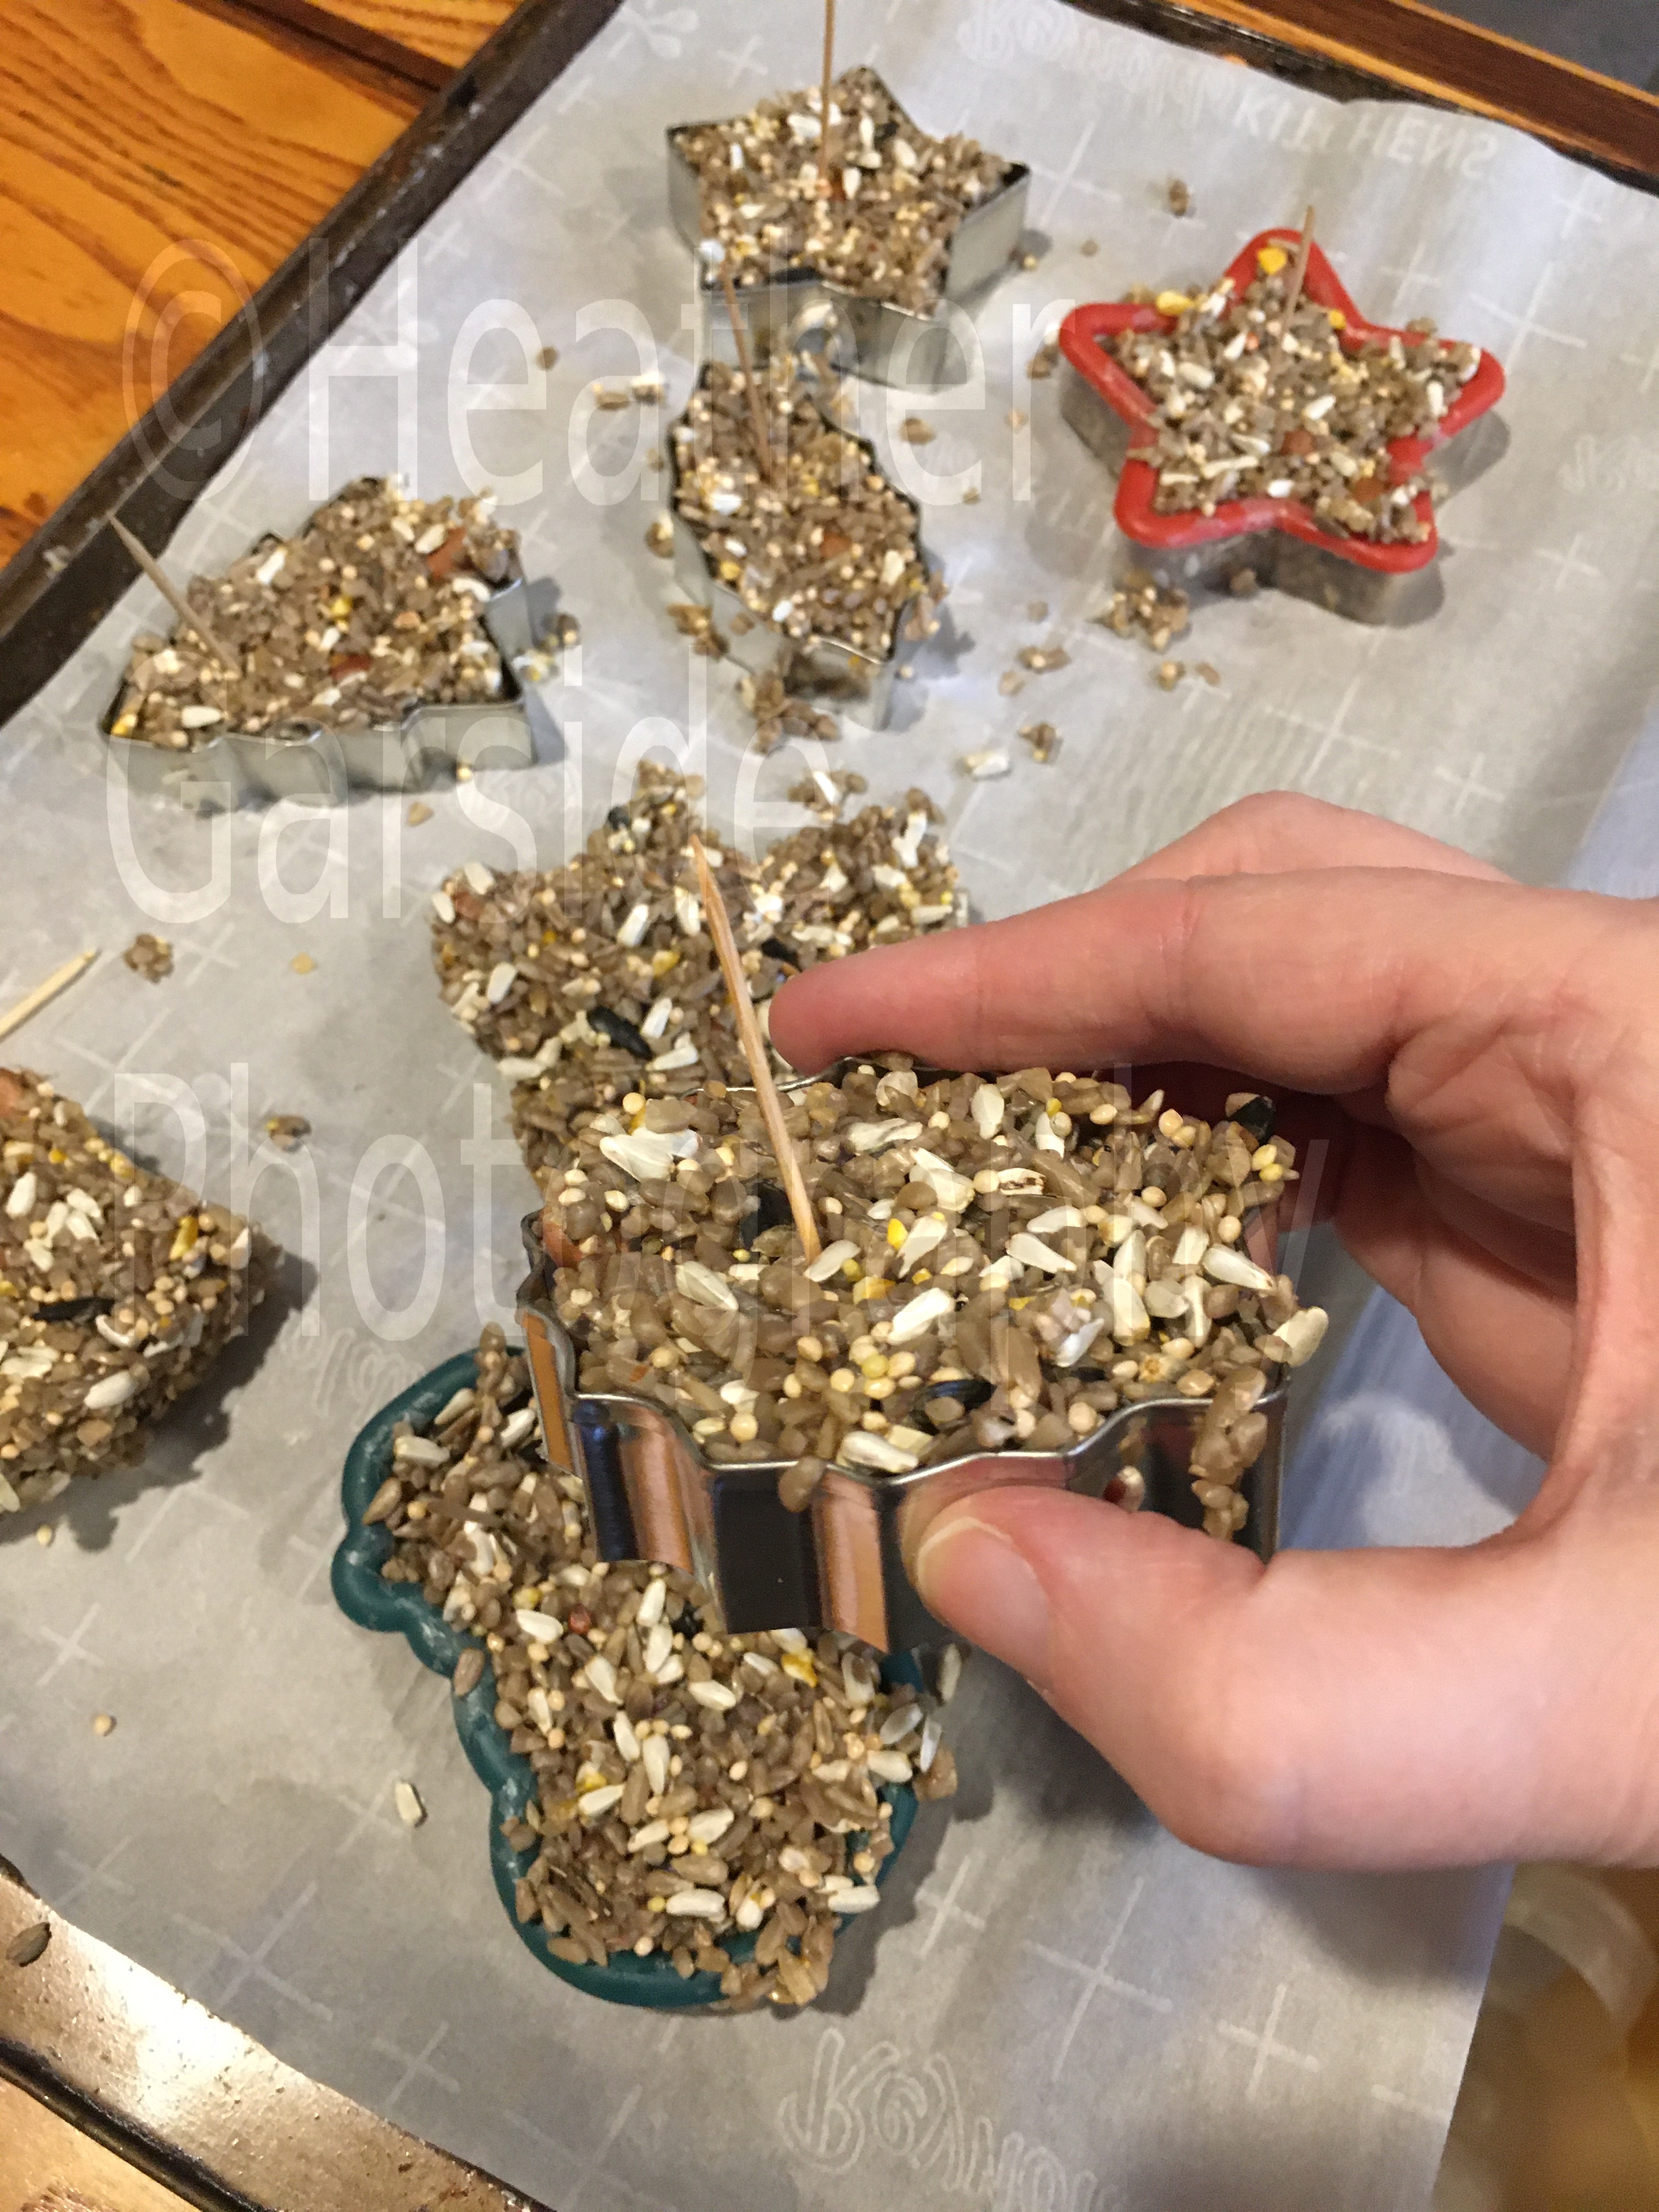
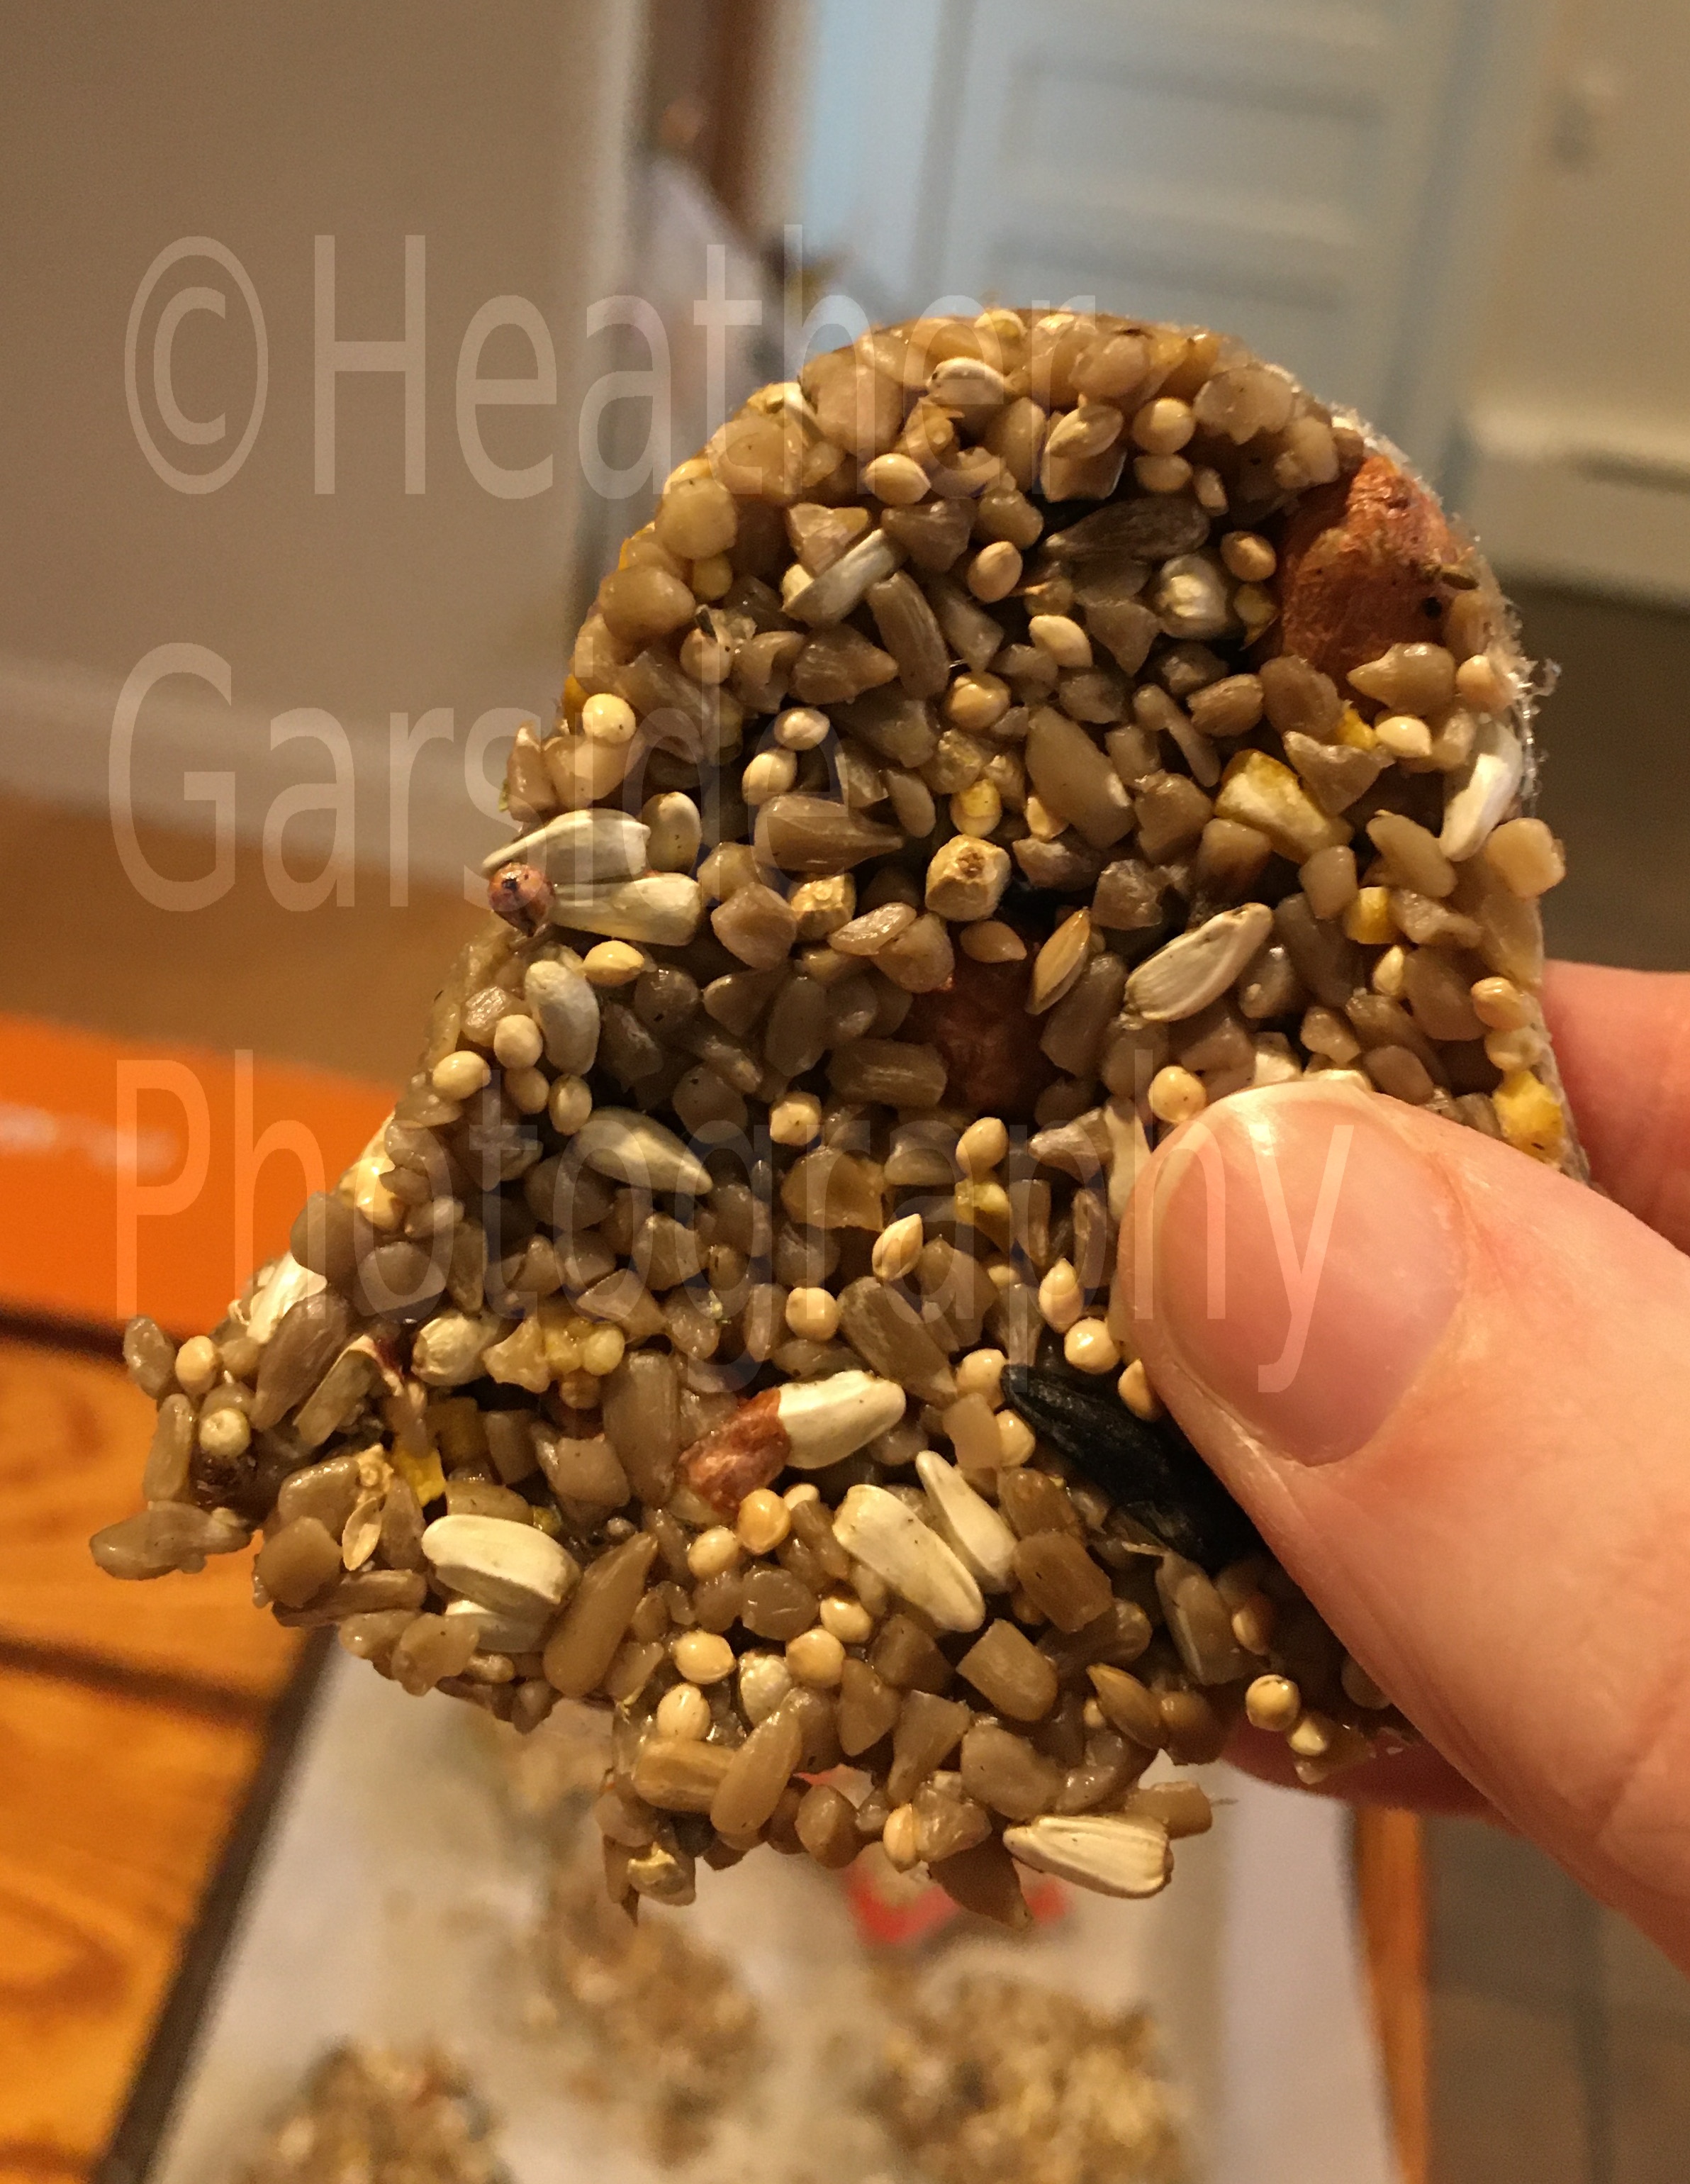
Here I varied from the directions a bit, primarily because I didn’t want to bother with getting my needle dirty. I decided to try sticking a toothpick into each piece while it was wet, hoping that upon removal the next day, the toothpicks would leave a hole big enough for the thread to go through.
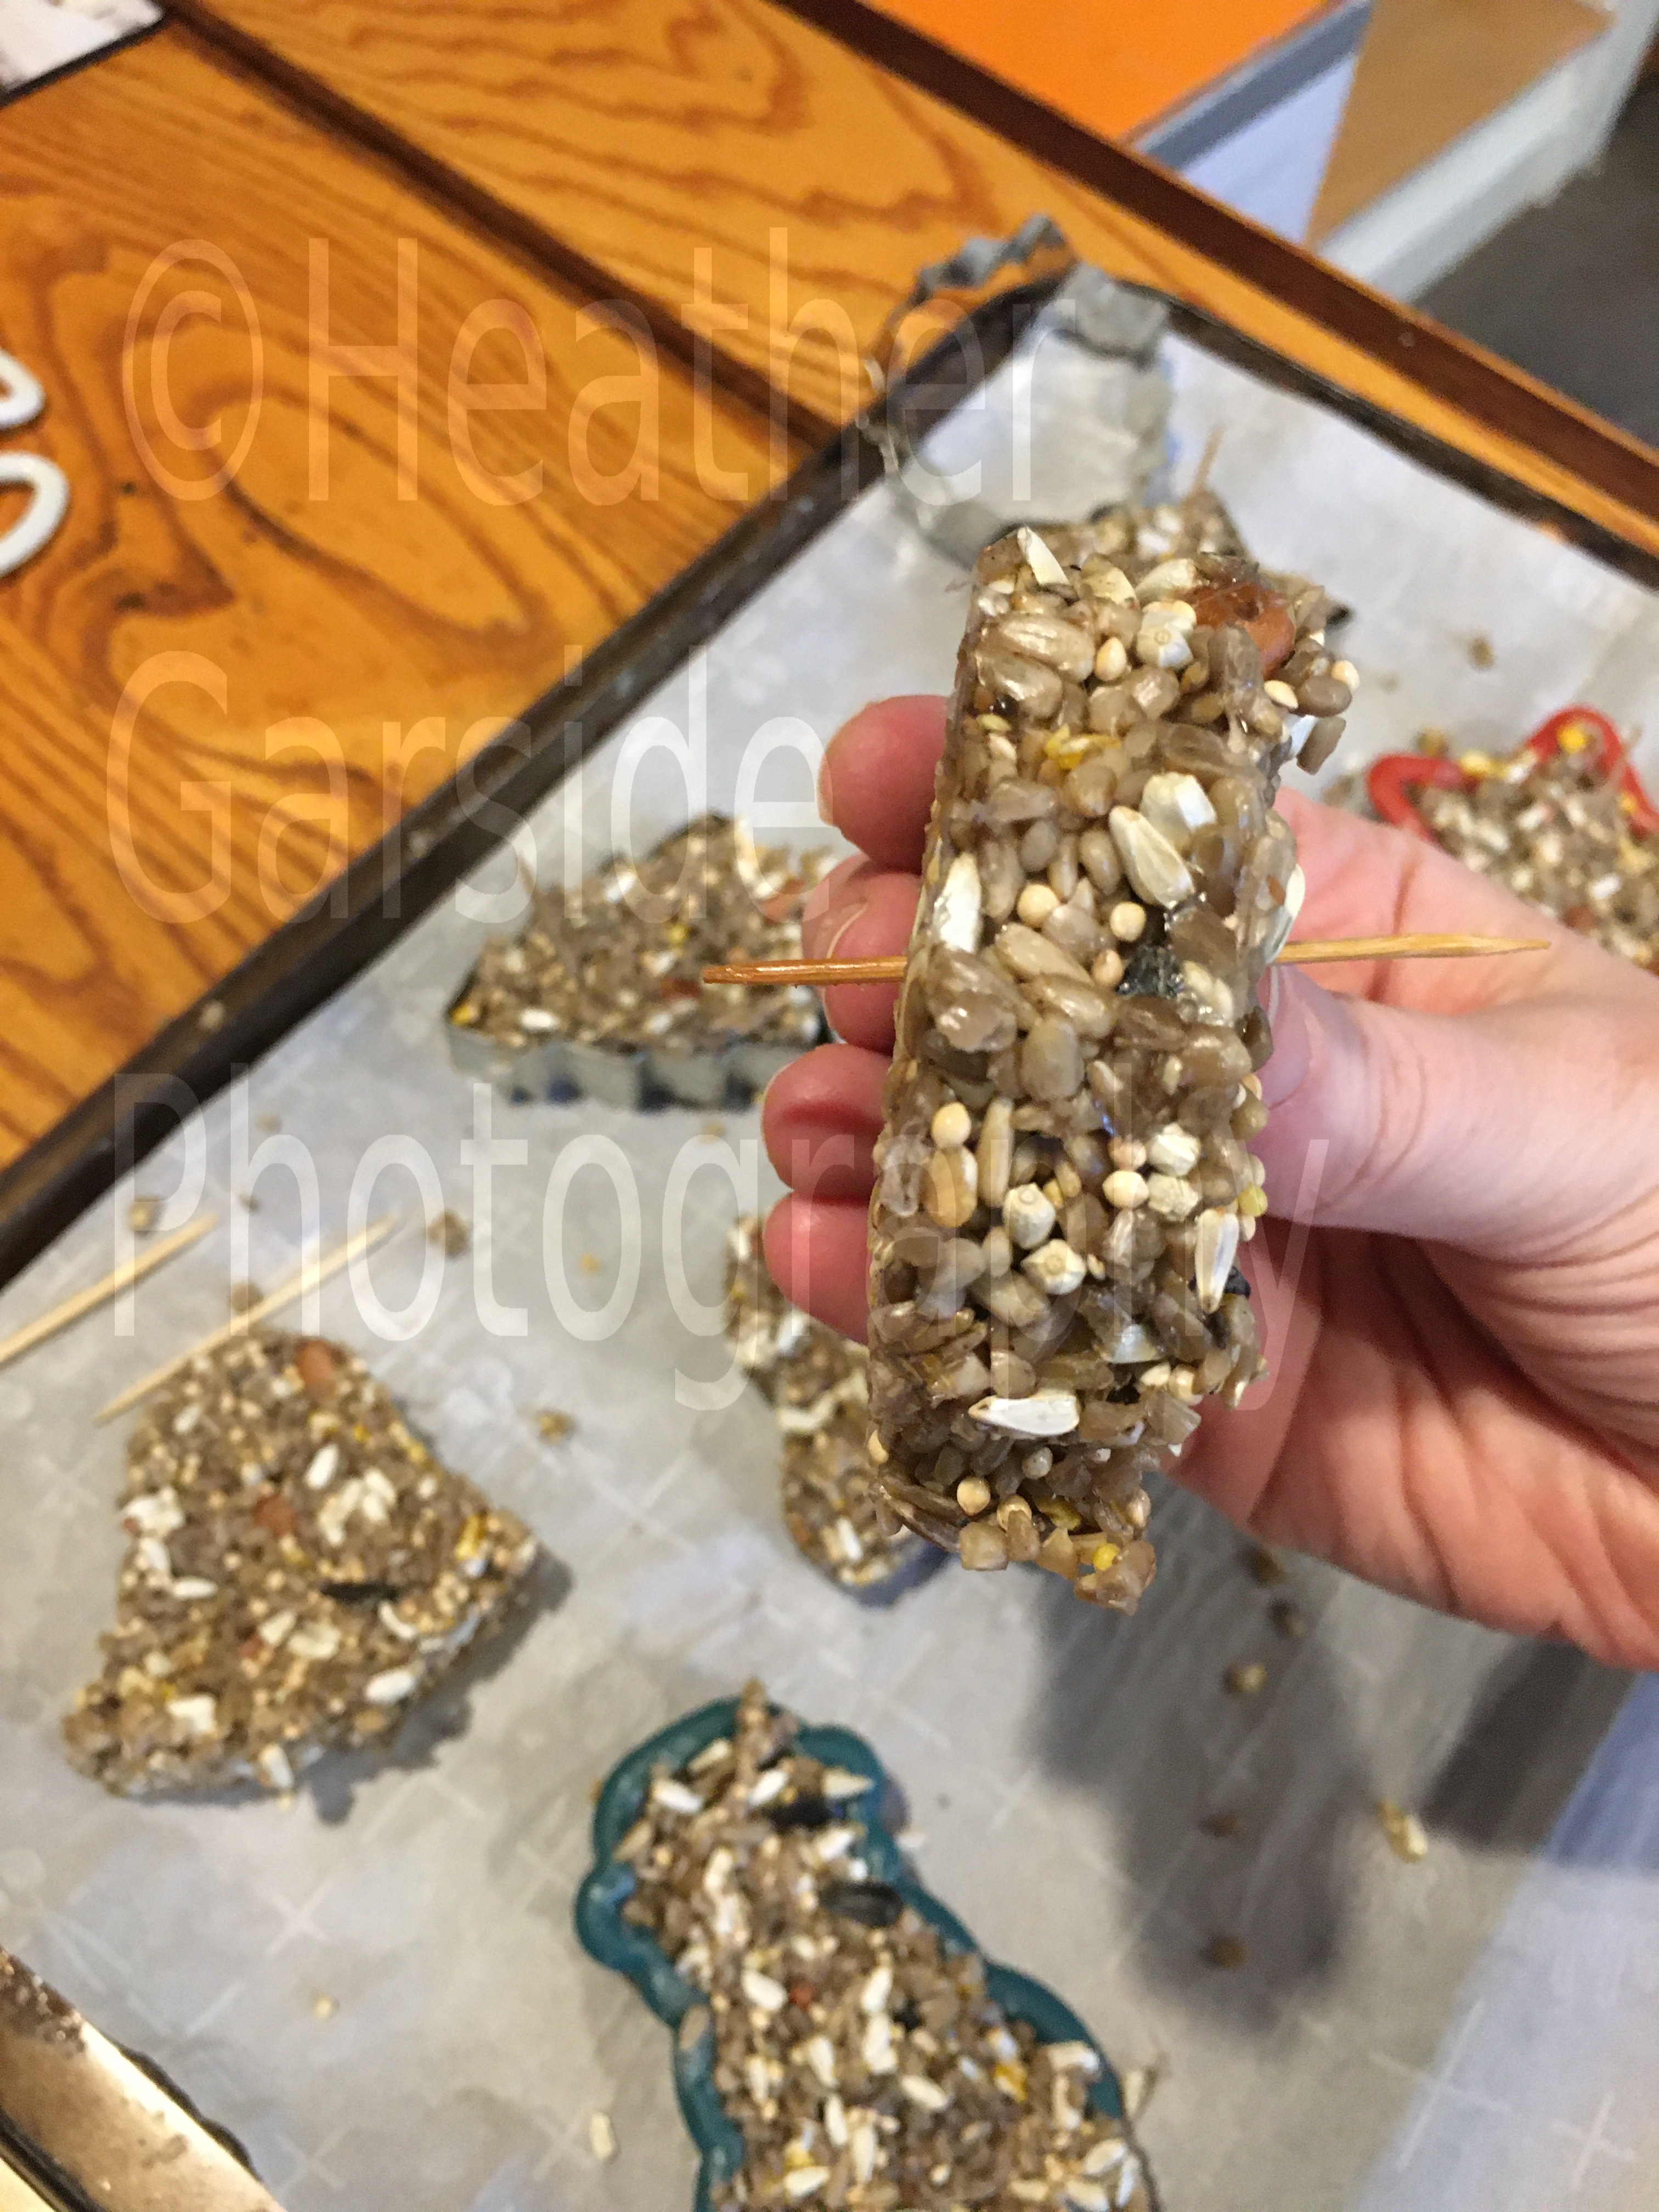

But once I removed the ornaments from the mold, it became apparent that my toothpicks had not pierced any of the ornaments all the way through. Once out of the molds I pushed the toothpicks deeper, finishing the job. The result was a needle shaped hole, and I was able to thread the ornaments without too much effort or muck on my needle. Upon reflection I am not sure the use of the toothpicks made that big of a difference. I could probably have used only one toothpick after removing them all from their molds and it would have been equally as effective. I used very thin, basic white dressmakers thread, which seems like it will do the job. Thicker string might be needed if you make a larger ornament.
Hang on a tree
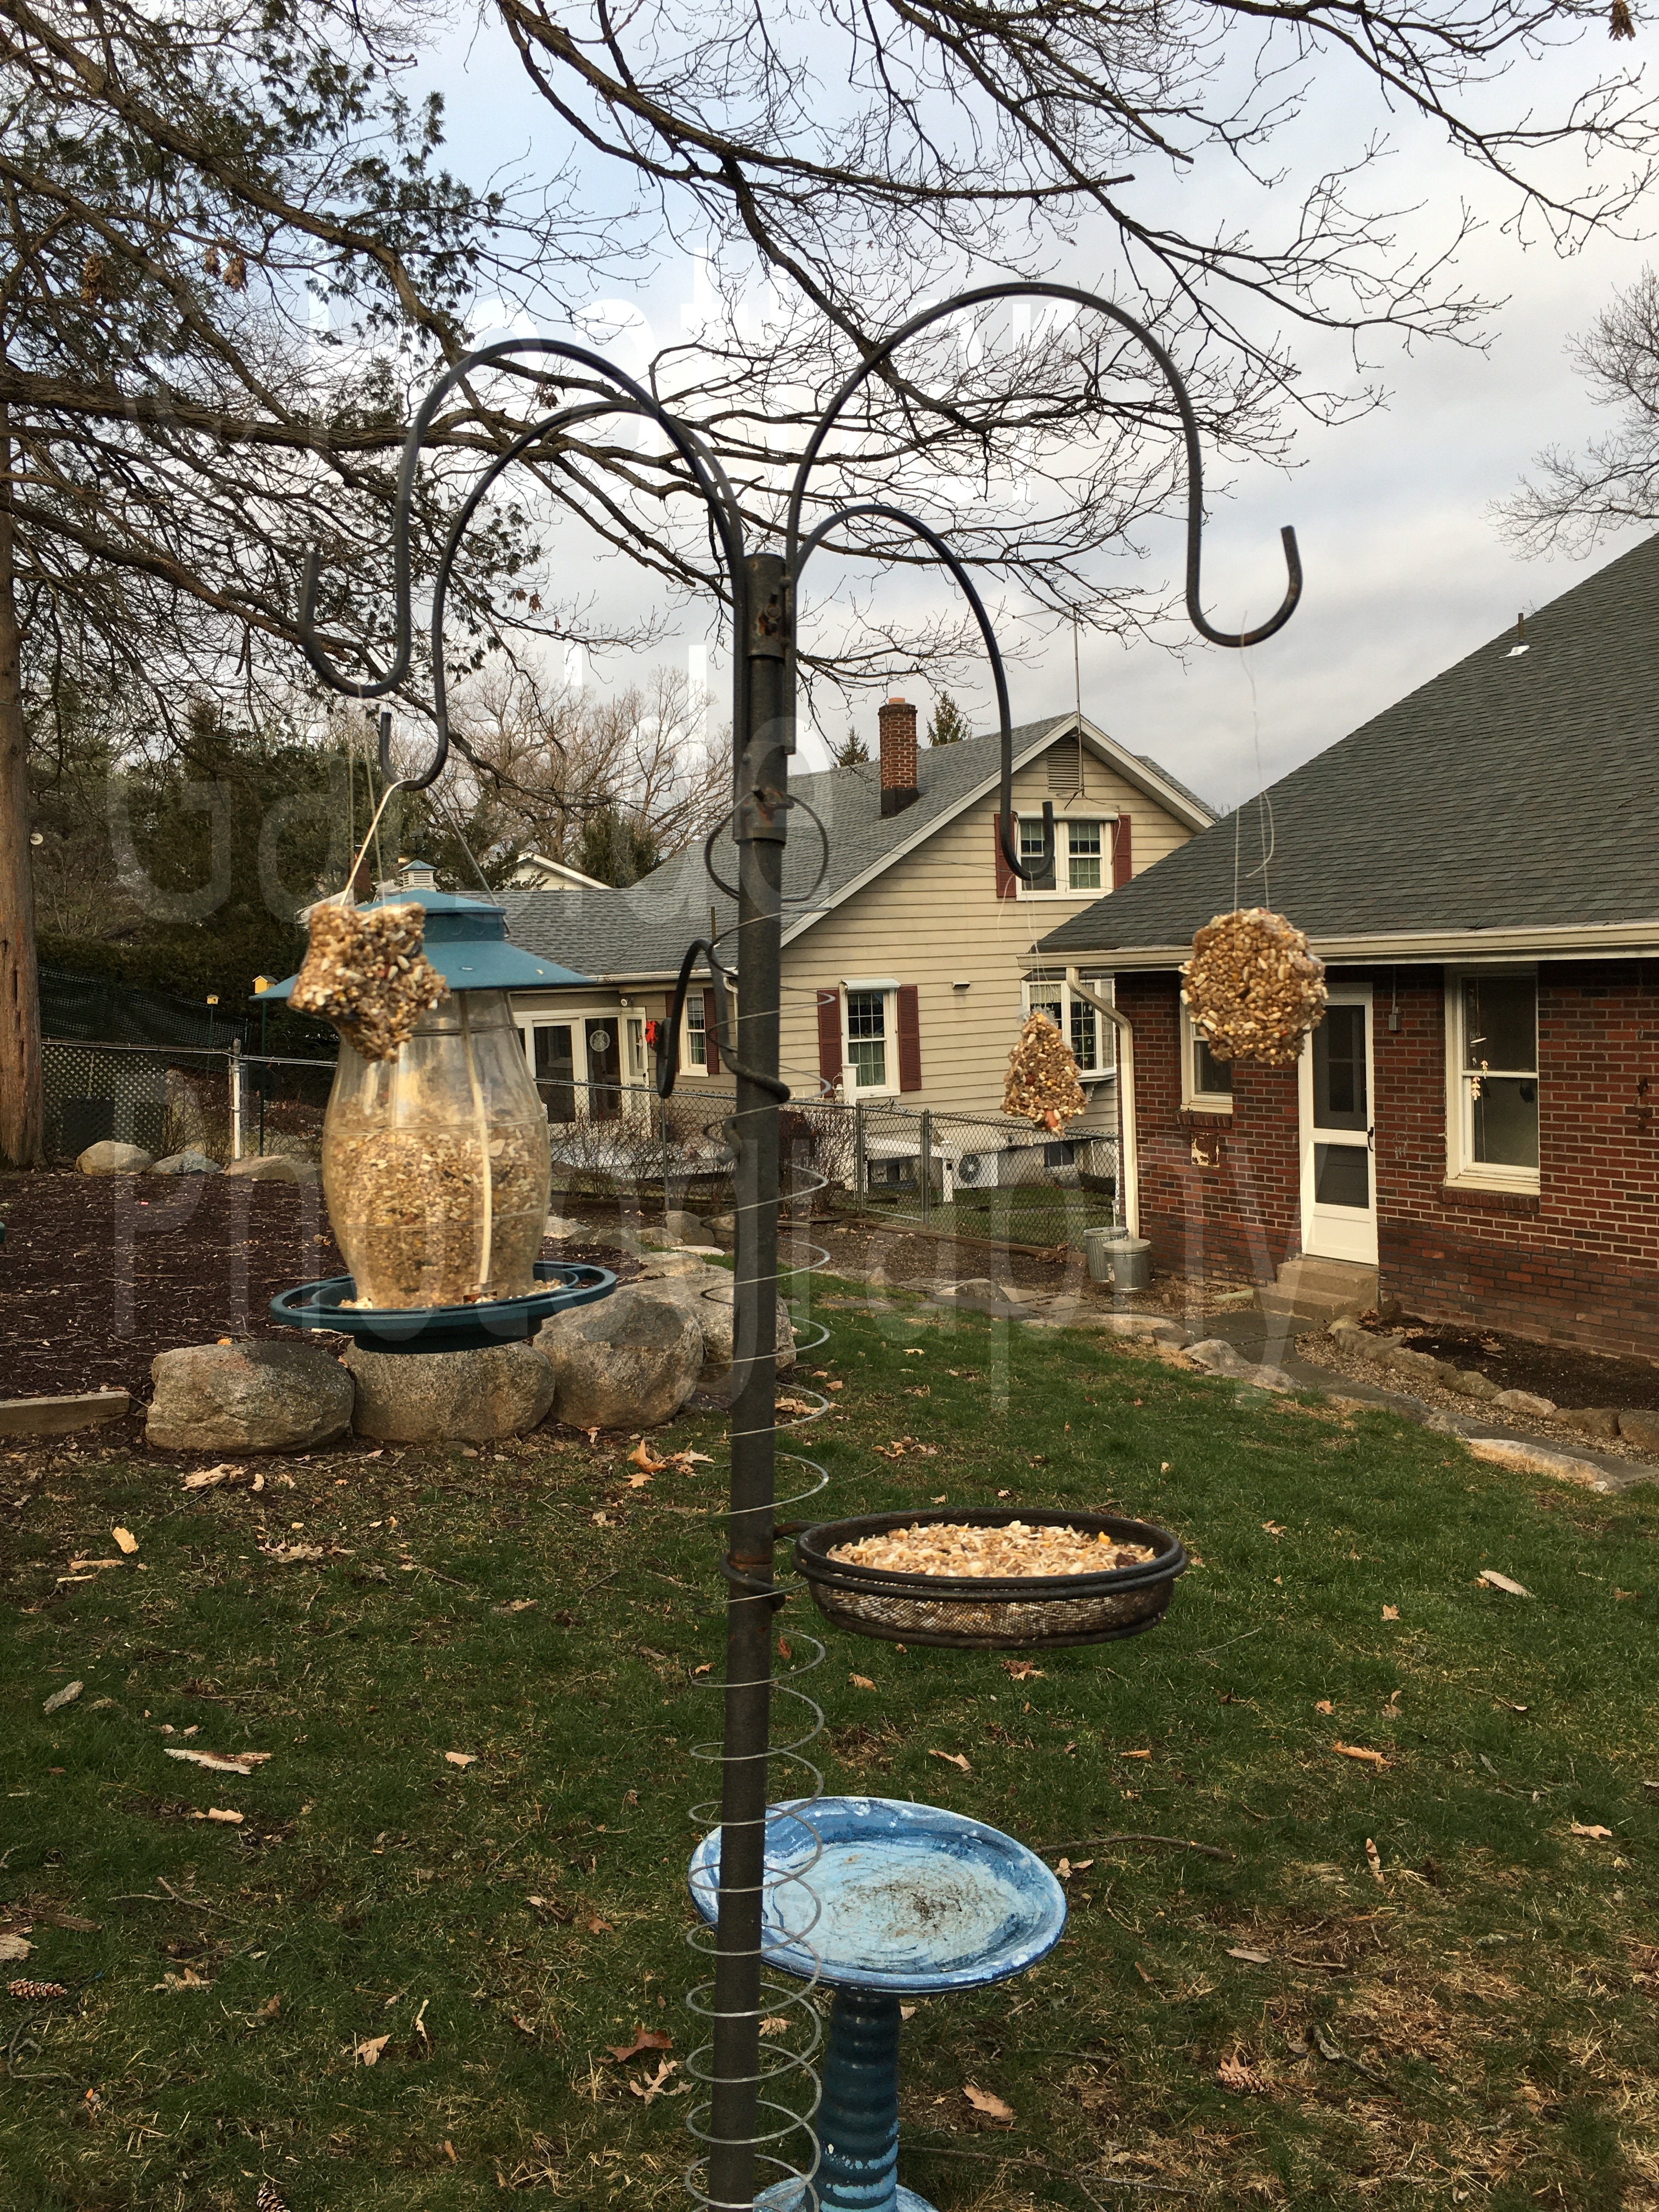
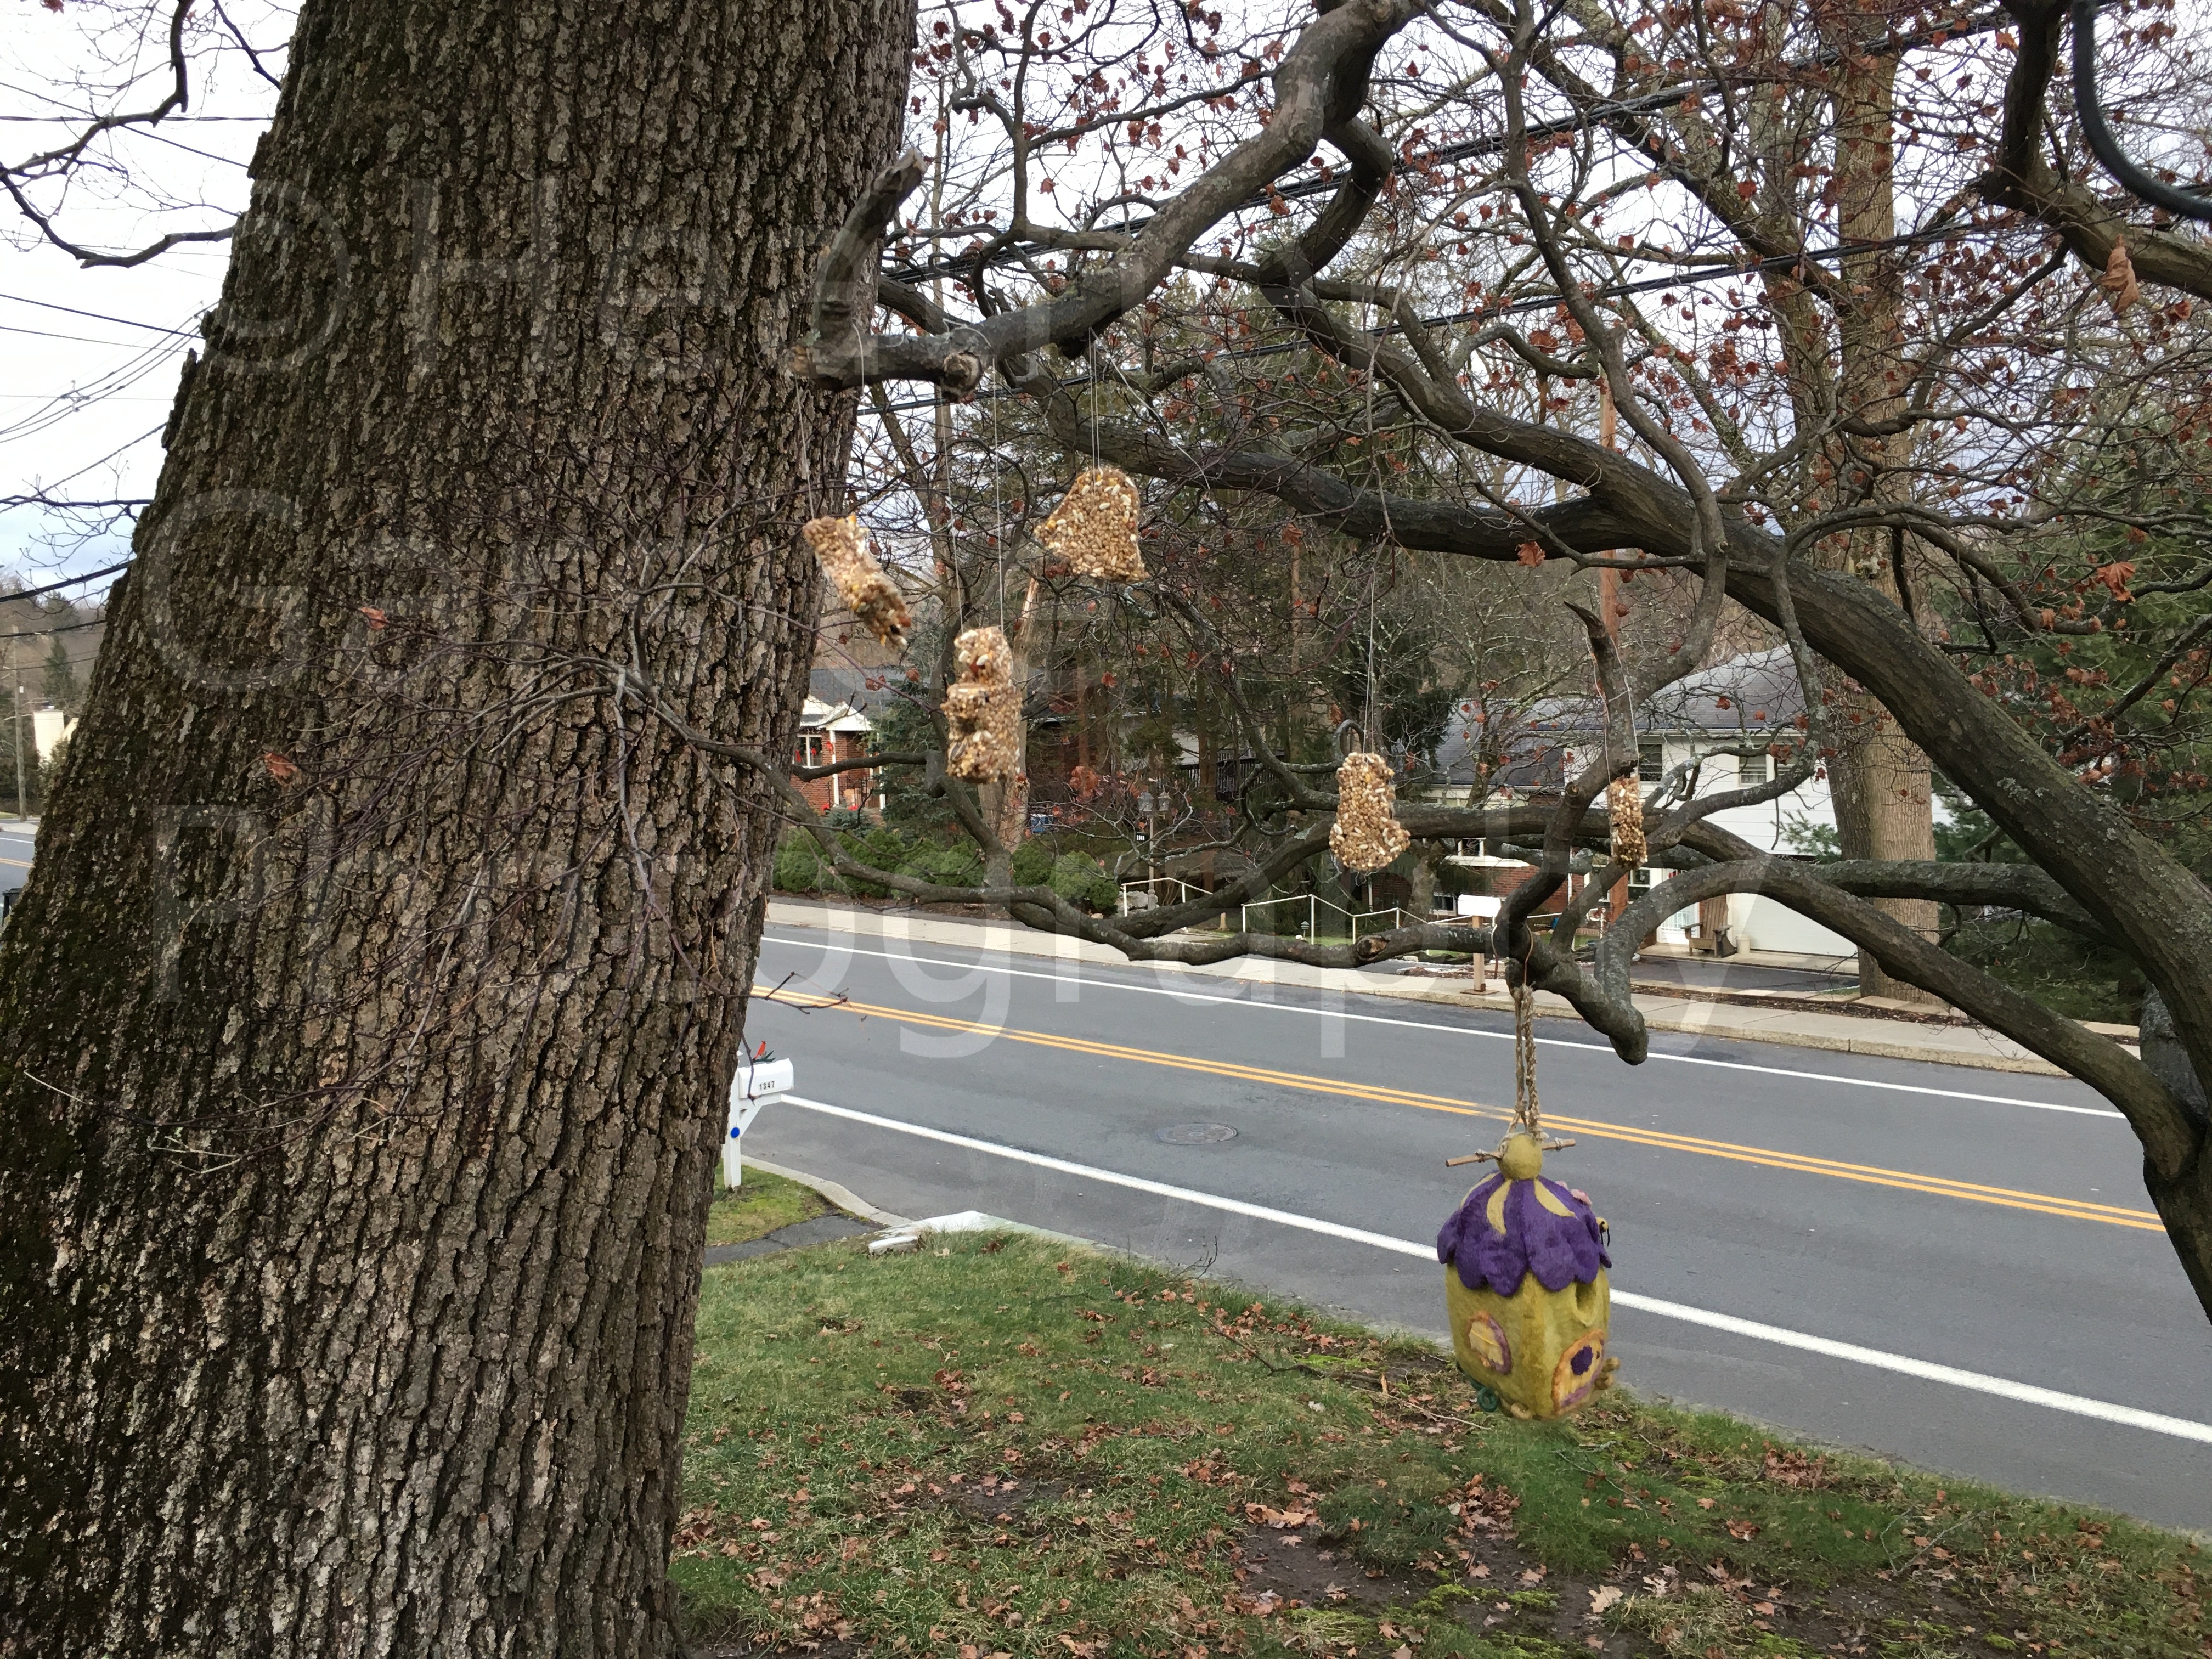
Since I have bird feeders in my front yard and backyard, I decided to divide the ornaments up. I placed three on the feeder pole in my back yard (left) and five on the tree in my front yard (right). That way I figured I had twice as many chances of seeing birds actually taking a bite out of my ornaments.
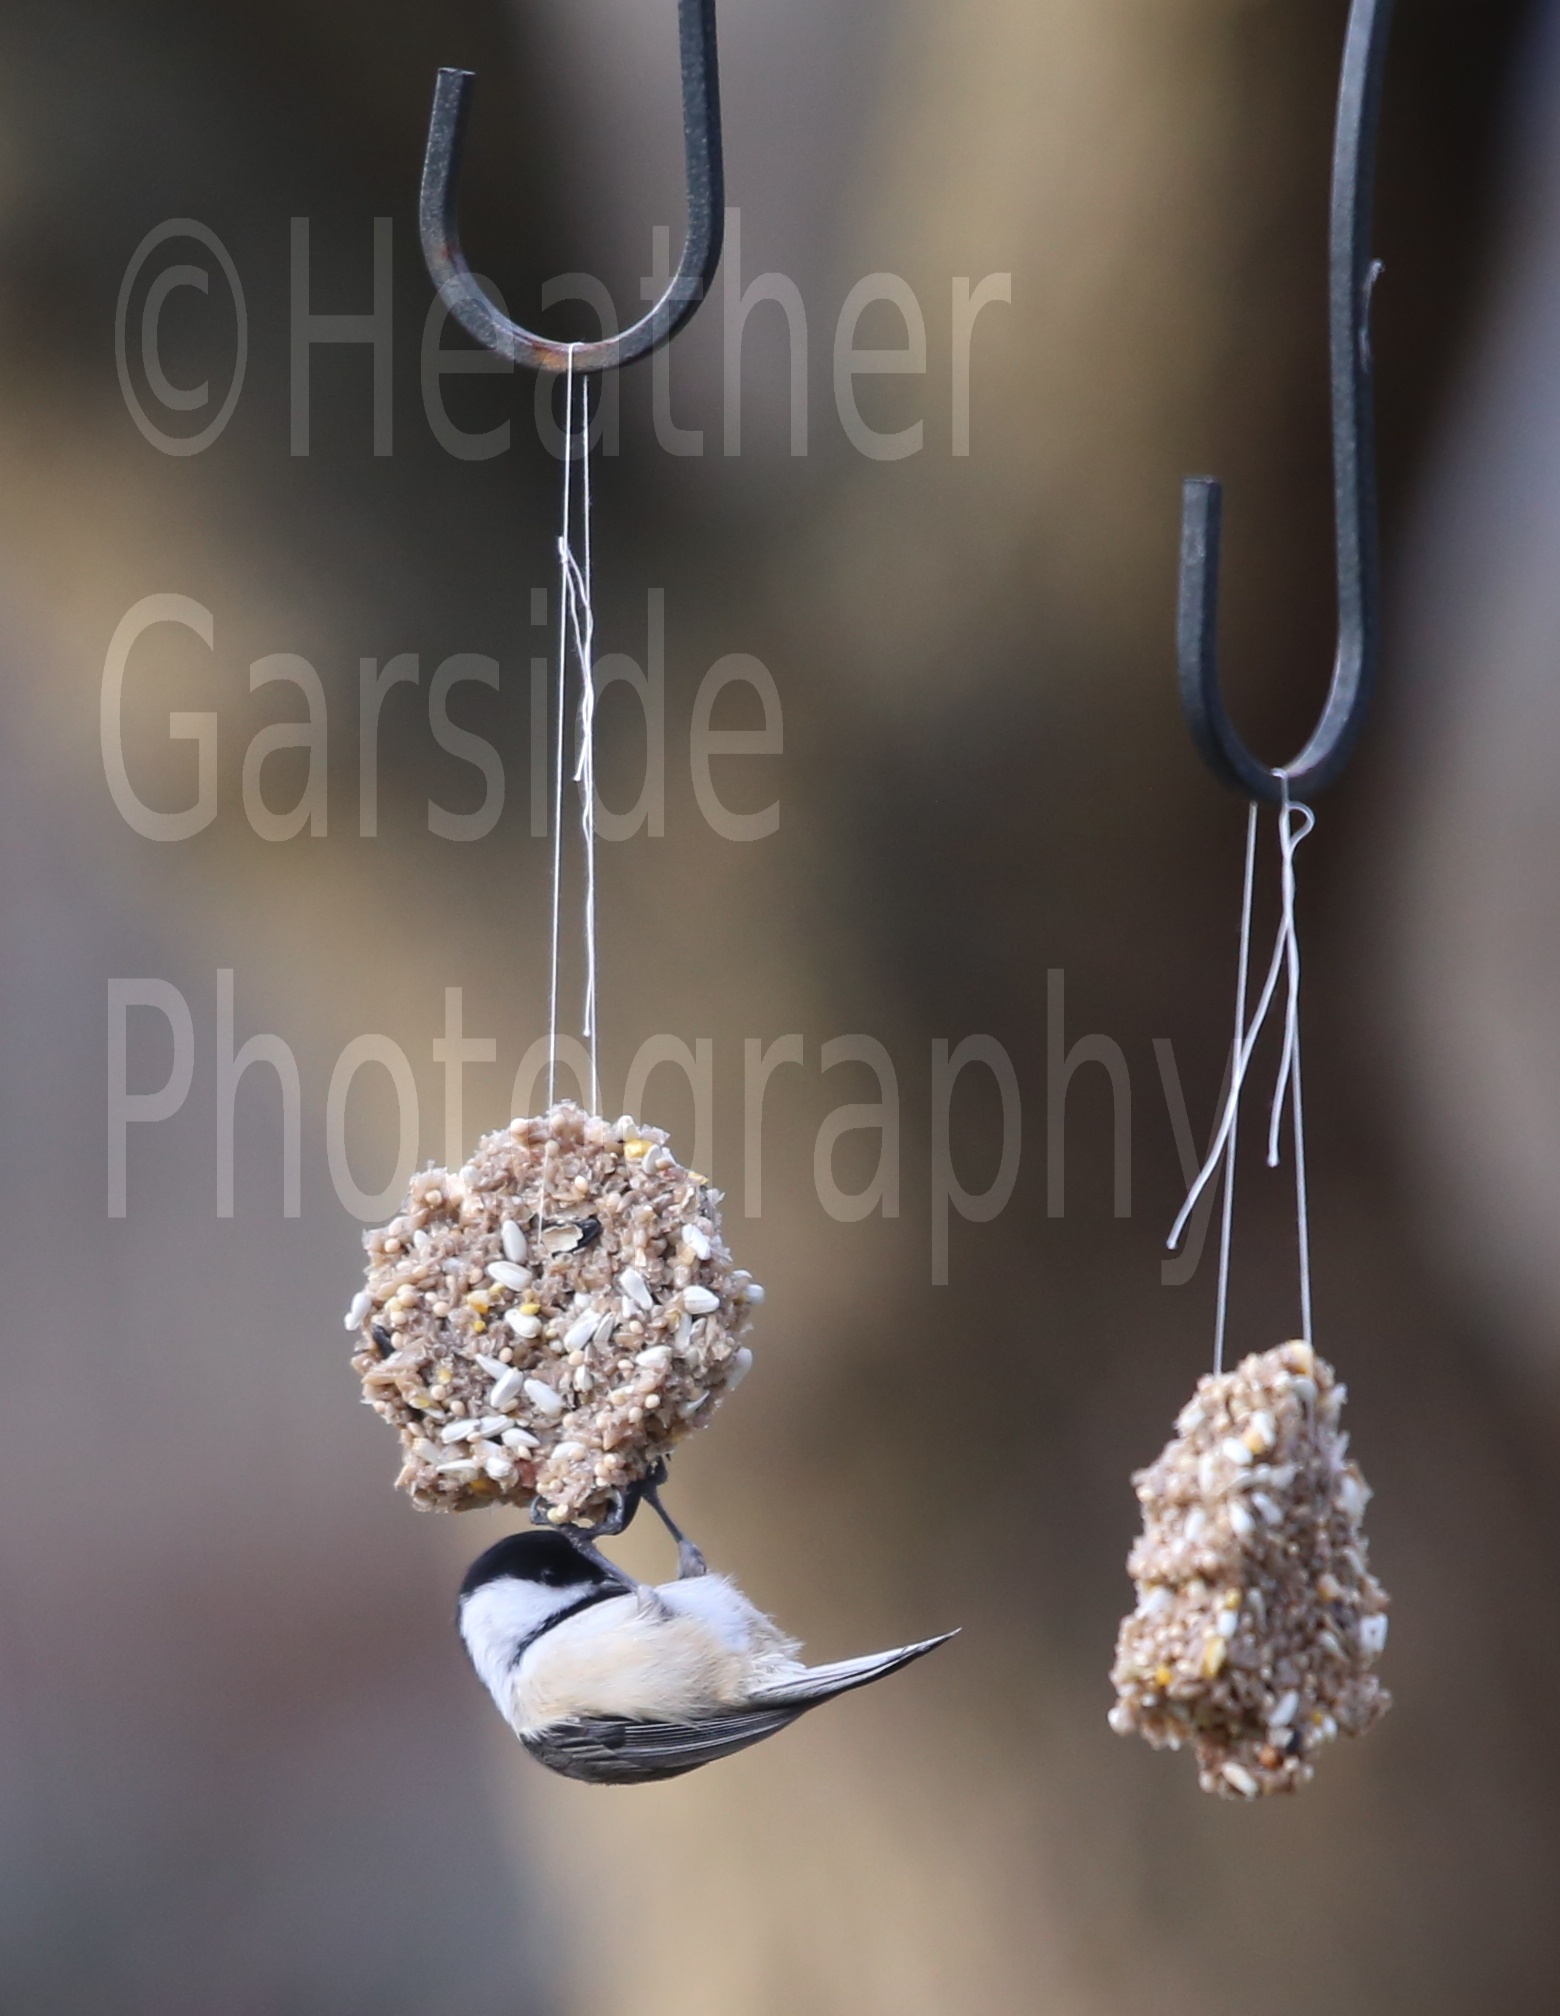
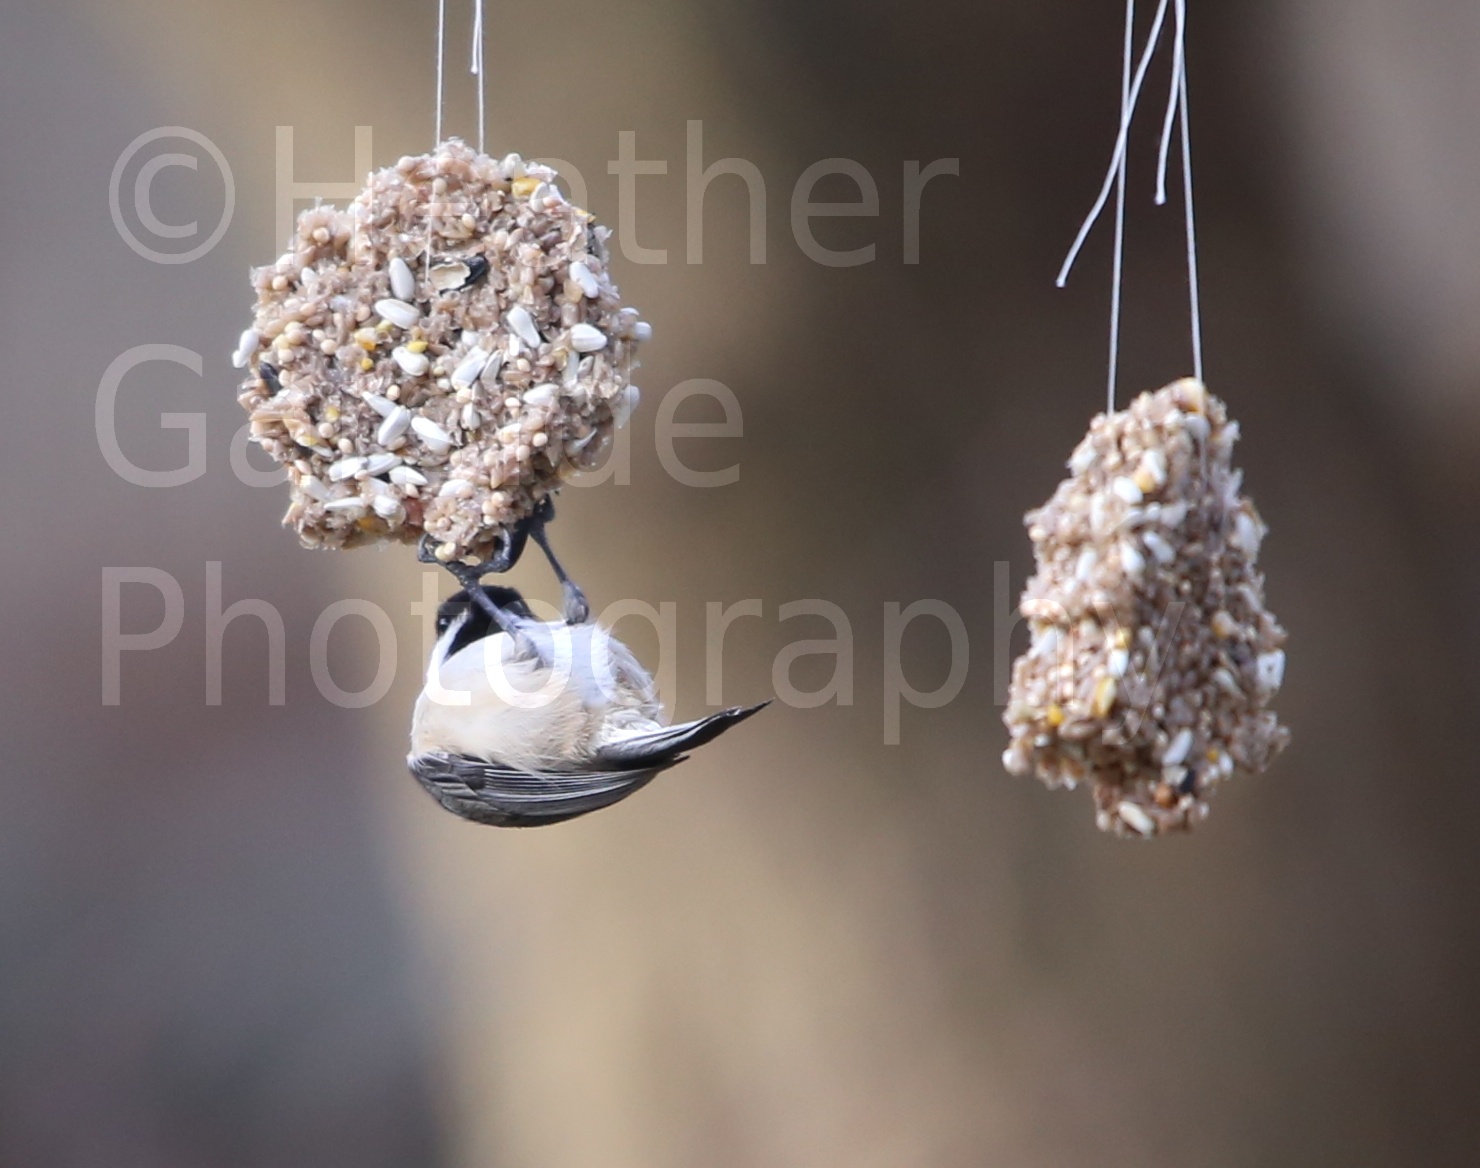
Two days later I took a turn around the yard and checked up on my ornaments. The few in the back were untouched, and I think perhaps because they were suspended from the feeder pole, and moving around in the wind, the birds didn’t feel comfortable perching on them. (10 days later I did spot a chickadee having a munch). The situation in the front yard was a bit different. Only one ornament remained on the tree, one was on the ground, and three were missing, strings and all. I think a squirrel may have carried them off whole, or perhaps the deer got at them? I am not sure if deer would be attracted to bird seed, but I suppose they are a lot less choosy this time of year.
Overall, I was happy with how this turned out. It was a lot less mess than the suet cakes. I think the lack of interest expressed by the birds had more to do with my placement of the ornaments than the ornaments themselves. I would be tempted to try this recipe again, and maybe get a bit more creative with the ornaments. If I do, you will be the first to know!
If you would like to see the original source for this recipe, here is the link to the National Audobon’s video: https://www.instagram.com/p/CJENO1jltBP/?igshid=1awom8neetfrr
